Tasks
Tasks are the core building blocks of scheduling in Hivekit and tie together nearly all other concepts. Every task is based on an activity. When a task is created, its initial duration is derived from the activity’s default duration, resource slots are created for the resources required by the activity, and expected metrics are calculated based on the activity’s metric definitions.
Tasks represent concrete pieces of work that are planned, executed, measured, and analysed.
Creating tasks
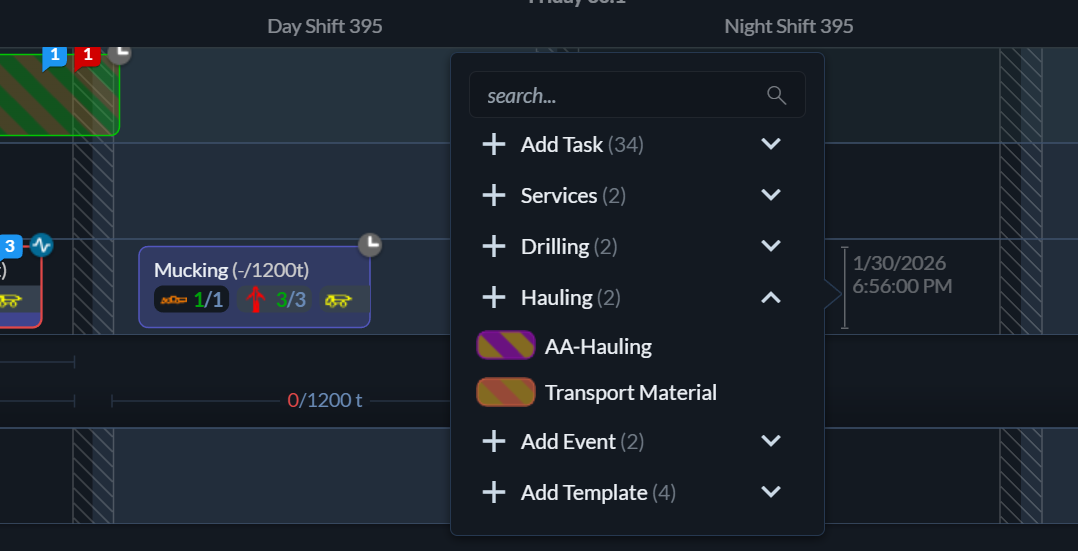 To create a task, open a schedule in timeline view and select the activity track where the task should be placed. Move the cursor to the desired start time and left-click to open the Add Task menu. This menu shows the hierarchy of all available activities, allowing you to create a task based on any of them.
Deleting tasks
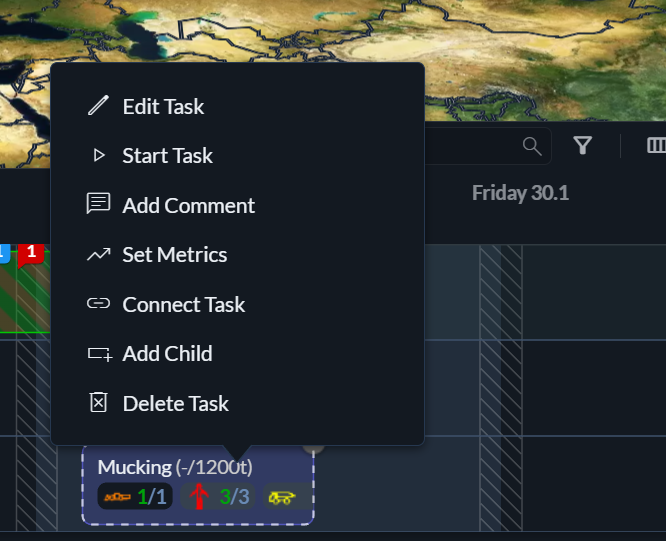 Tasks can be deleted in the timeline view by selecting a task and choosing Delete Task, or by pressing the Delete key while the task is selected.
Selecting tasks
 A single task can be selected by clicking on it. To select multiple tasks, either draw a selection rectangle around them or hold Shift while clicking tasks one by one.
Moving tasks
One or more selected tasks can be rescheduled or moved to a different location by dragging and dropping them. Tasks can be moved along the same track to change their timing or dropped onto another track to change their location.
Copying tasks
Selected tasks can be copied using Ctrl+C and pasted at the current cursor position with Ctrl+V. This creates new tasks that are exact copies of the originals, including their resource assignments and metrics.
Changing start, end, and duration
 To adjust a task’s duration in timeline view, drag its left or right edge to shorten or extend it. For precise control, open the task details panel by double-clicking the task or by selecting it and choosing Edit Task, where exact start and end times can be entered.
Task status

Tasks move through a simple lifecycle: Pending → In Progress → Completed or Failed.
You can change a task’s status in the timeline view by selecting it and choosing Start Task, Mark Completed, or Mark Failed. In table view, the status can be changed by clicking the status icon in the top-left corner of the task row.
Connecting tasks
Multiple tasks can be connected by selecting them and choosing Connect Tasks from the context menu. Connected tasks form a sequence. When one task is marked as completed or failed, the next task in the sequence automatically starts.
When combined with automatic task completion based on the main metric, this allows progress tracking and status transitions to be handled largely automatically.
Parent and child tasks
 Tasks can be organised into parent and child relationships. This allows multiple operational steps to be grouped under a single parent task.
For example, advancing a heading in an underground mine might be represented by a parent task for a Drill Cycle activity, with drilling, charging, blasting, mucking, and services represented as child tasks. This makes complex workflows easier to manage while preserving detail.
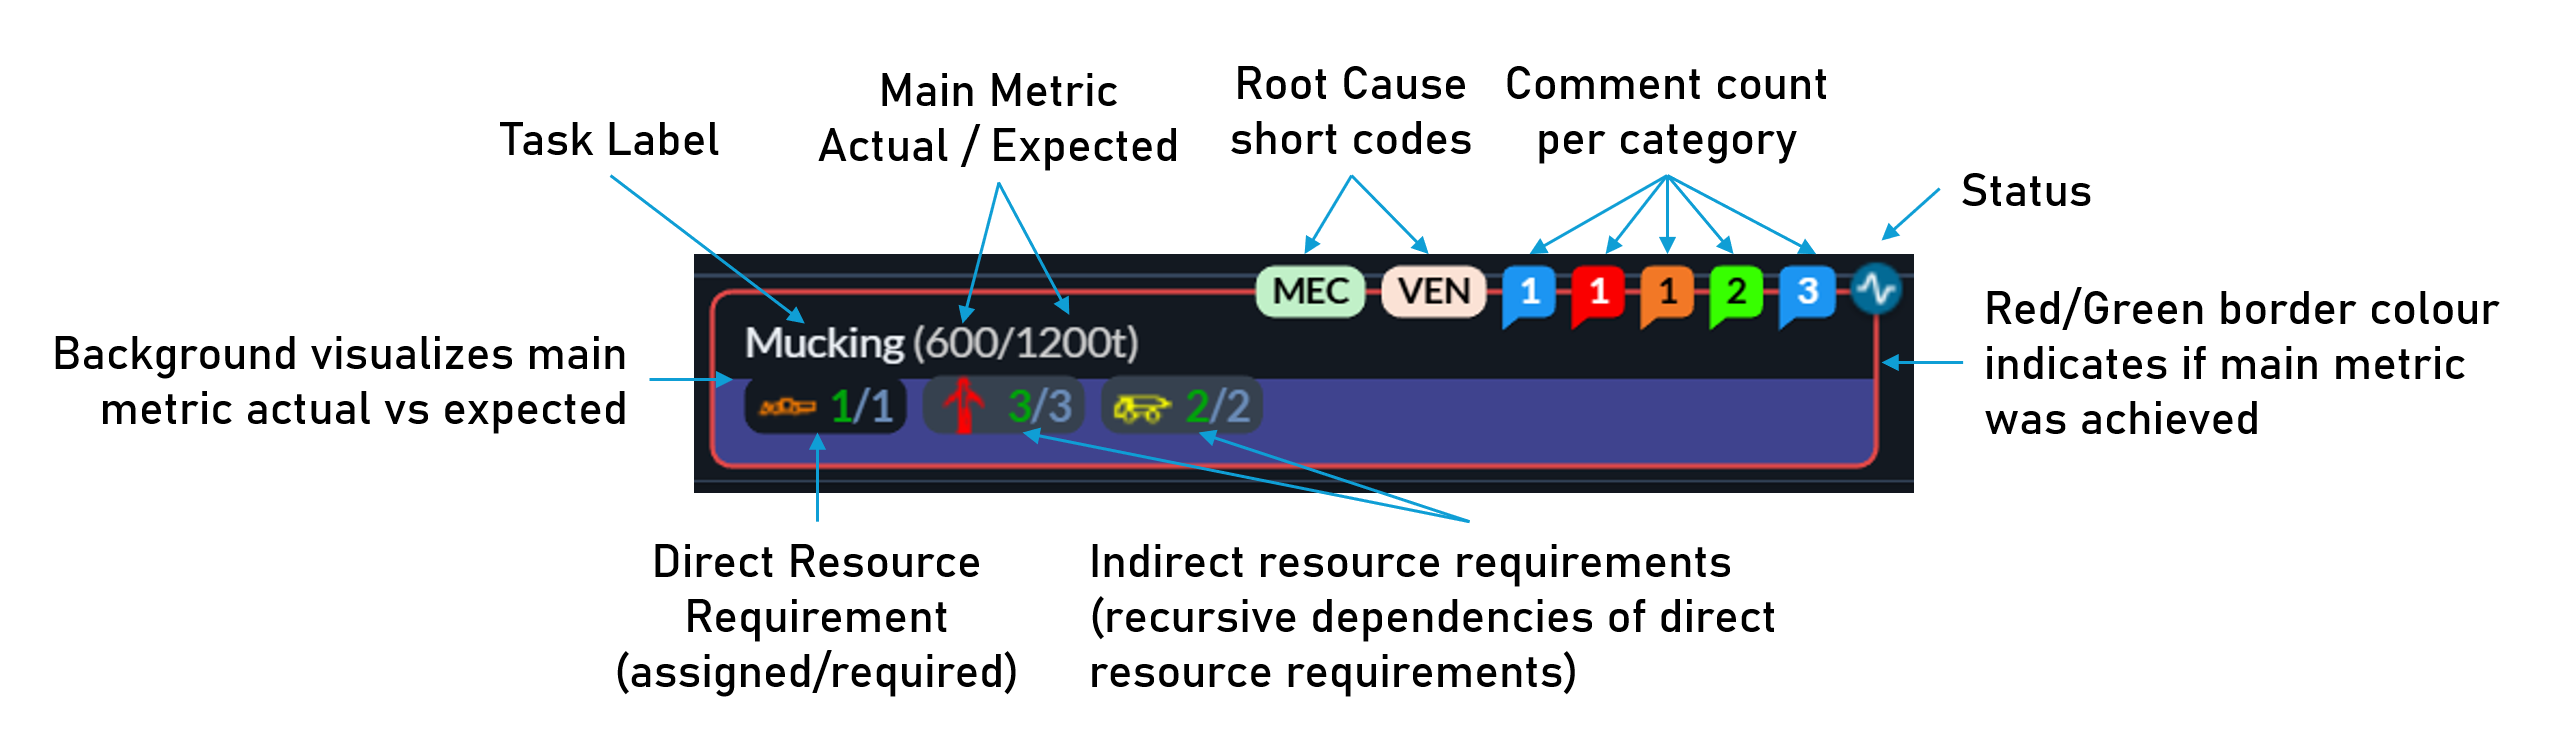
Task label
Each task has a label. By default, the label is inherited from the activity it is based on, but it can be customised to describe the task more precisely. The label can be changed in the task details panel.
Related concepts
Tasks interact with several other core concepts in Hivekit:
- Comments can be added to provide context or instructions.
- Resource assignments define which people, vehicles, and equipment perform the task.
- Metrics capture performance and outcomes.
- Templates allow tasks to be reused.
- Plan applications can create tasks automatically from long-term plans.
Each of these topics is covered in more detail in the corresponding sections of the documentation.