Print View
Hivekit provides a dedicated schedule print view designed to present the structure and goals of an entire week in a compact, single-page format. This view focuses on activities and outcomes rather than individual people or resource assignments. For crew-specific information and resourcing details, use the lineup print view instead.
Showing the print view
![]()
To open the print view, click the print icon in the top-right corner of the schedule. Once the print view is visible, adjust the displayed time span using the date and range controls in the top-right to ensure the correct period is shown.
Print view structure
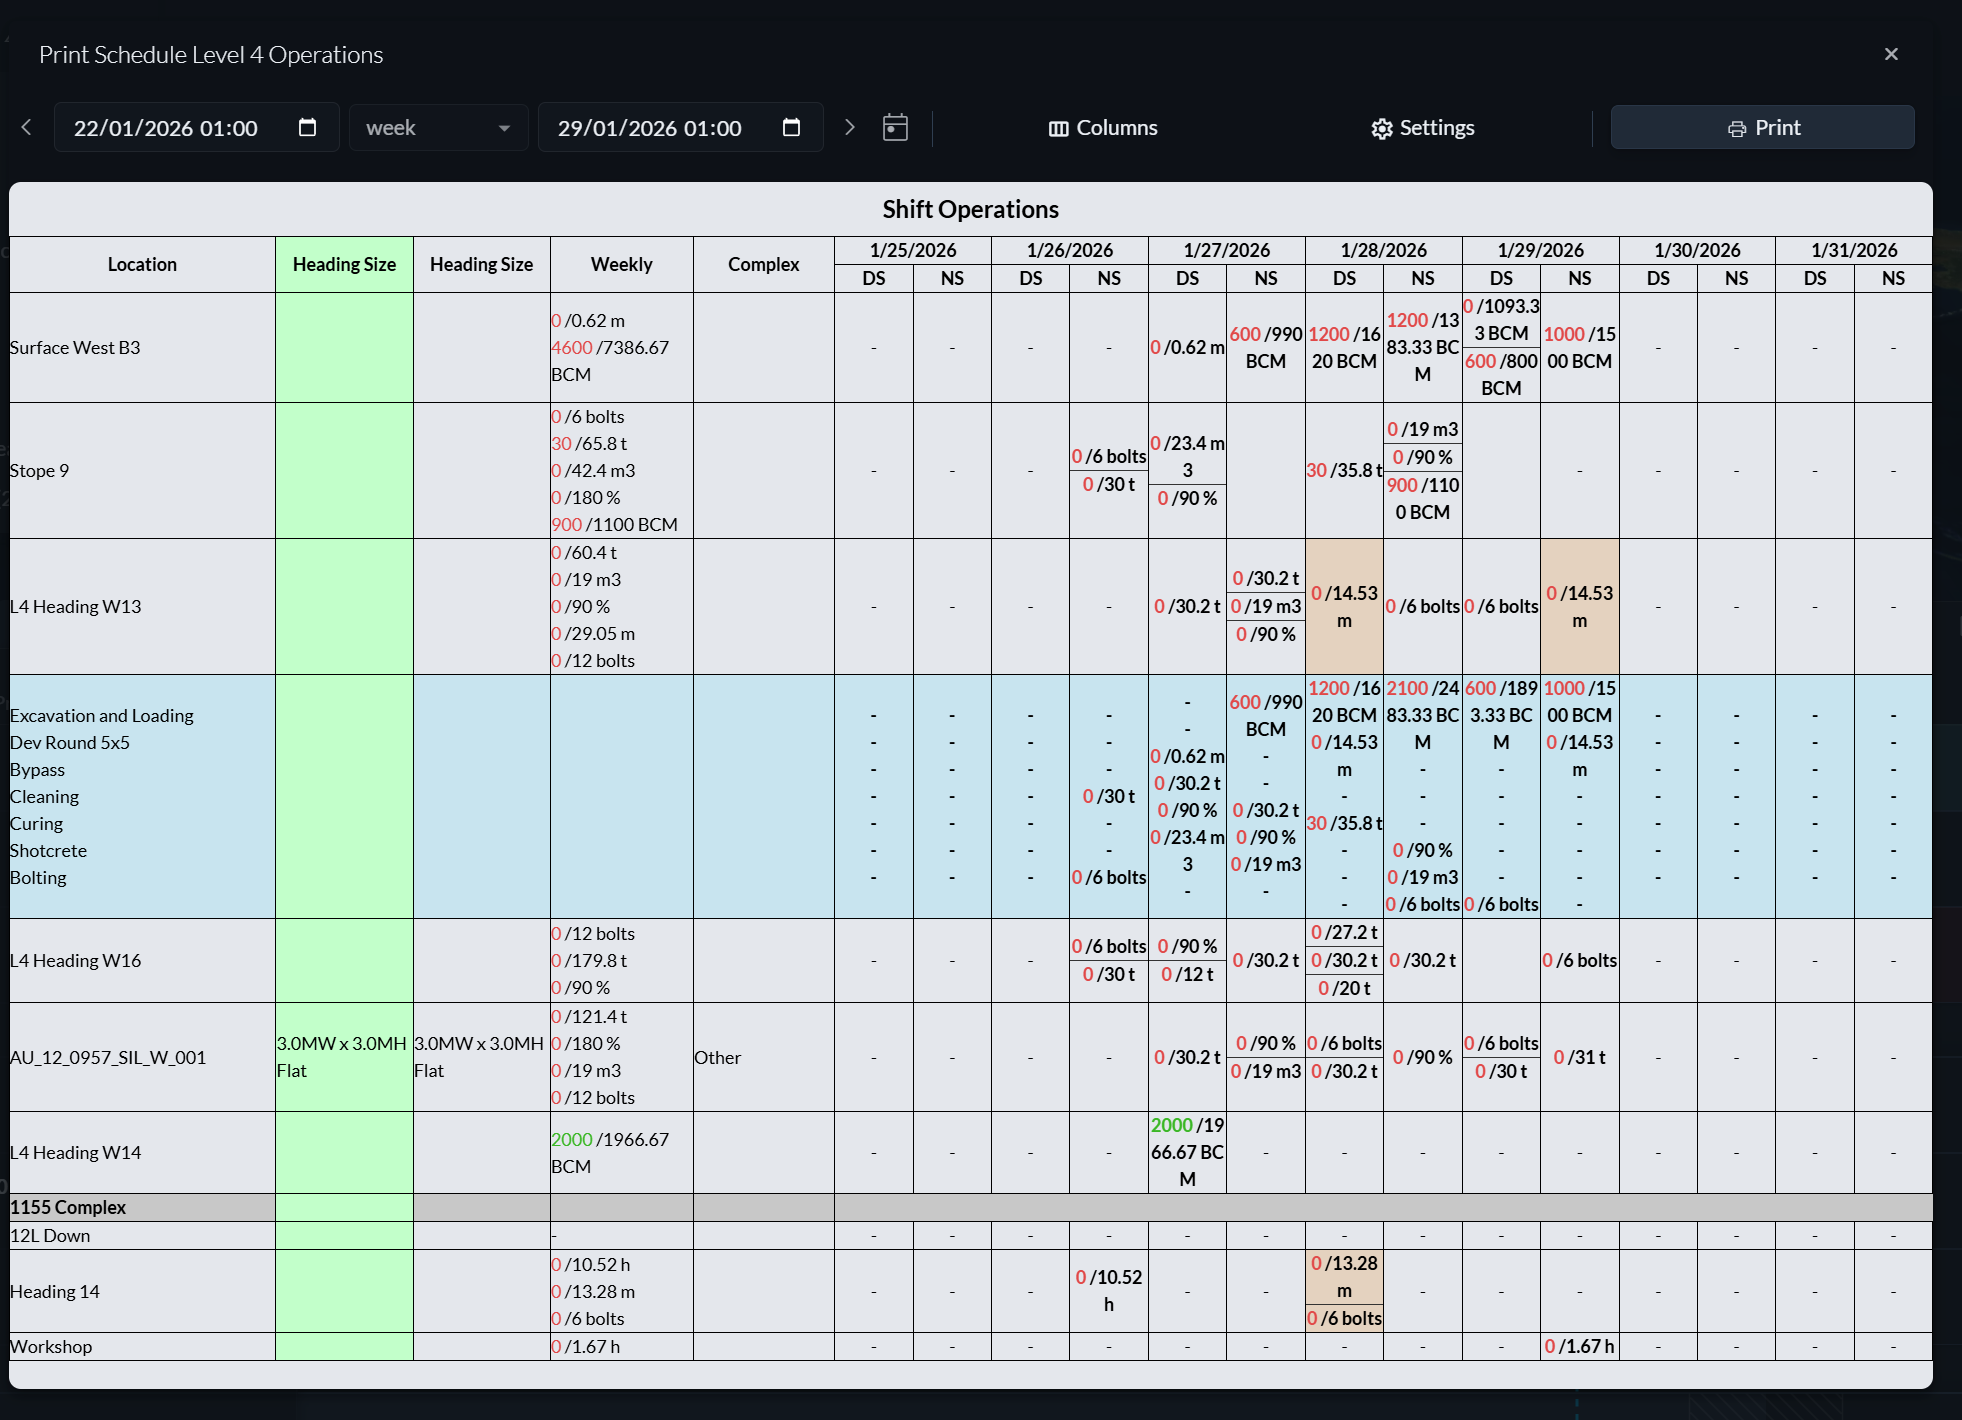
The print view mirrors the track structure of your schedule. Instead of showing individual tasks, it displays aggregated metrics for each location and shift. For example, it can show how many metres are planned to be drilled or how many tons are expected to be moved across all activities in a given shift.
Any aggregate tracks defined in the schedule are also included. In addition, the print view can display extra columns with location details and summary columns that aggregate values over longer periods, such as total targets for the week.
Cell colouring is used to indicate shifts in which events occur. The background of a cell is coloured using the event’s colour, which is particularly useful for visualising event-driven plans such as blast schedules on a mining site.
Column configuration
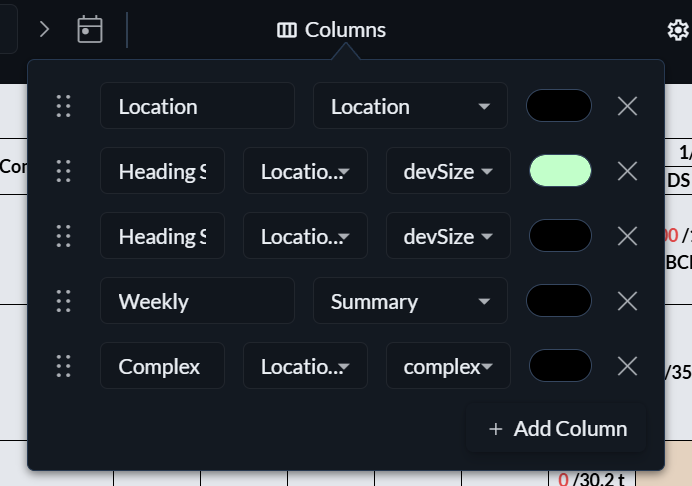
By default, the print view shows one column per shift within the selected timeframe. You can add additional columns as needed, each with a custom label and background colour.
To configure columns, click Columns above the print view. From there, you can add, remove, reorder, and customise columns. The available column types include:
-
Location
Displays the location label. -
Priority
Shows the assigned priority and level. -
Status
Displays the track’s status. -
Location field
Displays the value of a specific field from the location. -
Summary
Displays aggregated metric values for the row across the selected time span.
Print settings
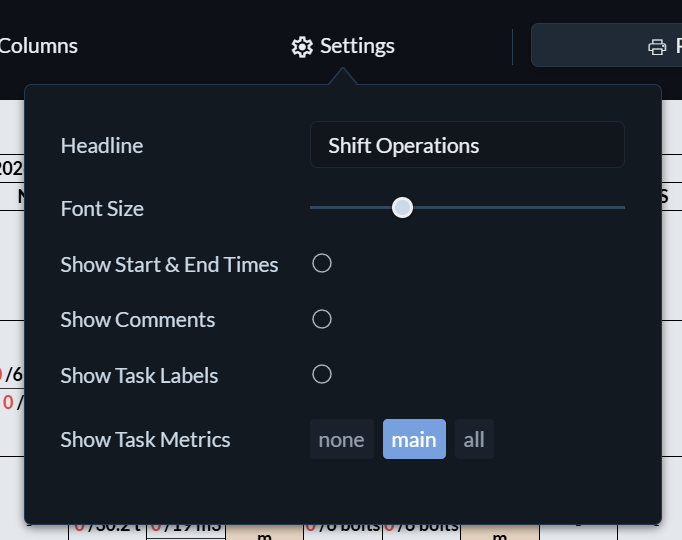
Clicking the settings menu at the top of the print view opens additional display options. These include:
-
Headline
A title displayed above the printout. -
Font size
Controls the overall text size. -
Show start and end times
Displays task start and end times. -
Show comments
Includes comments associated with the tasks. -
Show task labels
Displays activity names or custom task labels. -
Show task metrics
Controls whether task metrics are shown at all, only the main metric, or all metrics.