Schedule Panel and Controls
Hivekit provides extensive, fully integrated planning and scheduling capabilities. To open the scheduling panel, click the Schedule icon on the right-hand side of the screen. To configure or edit scheduling-related entities, open the Settings panel and navigate to the Scheduling section.
The scheduling panel
The scheduling panel is located at the bottom of the screen. You can resize it by dragging its top edge up or down. To expand the panel to full screen, click the maximise icon in the top-right corner. Clicking the same icon again restores the panel to its previous size.
To close the scheduling panel entirely, click the × icon in the top-right corner.
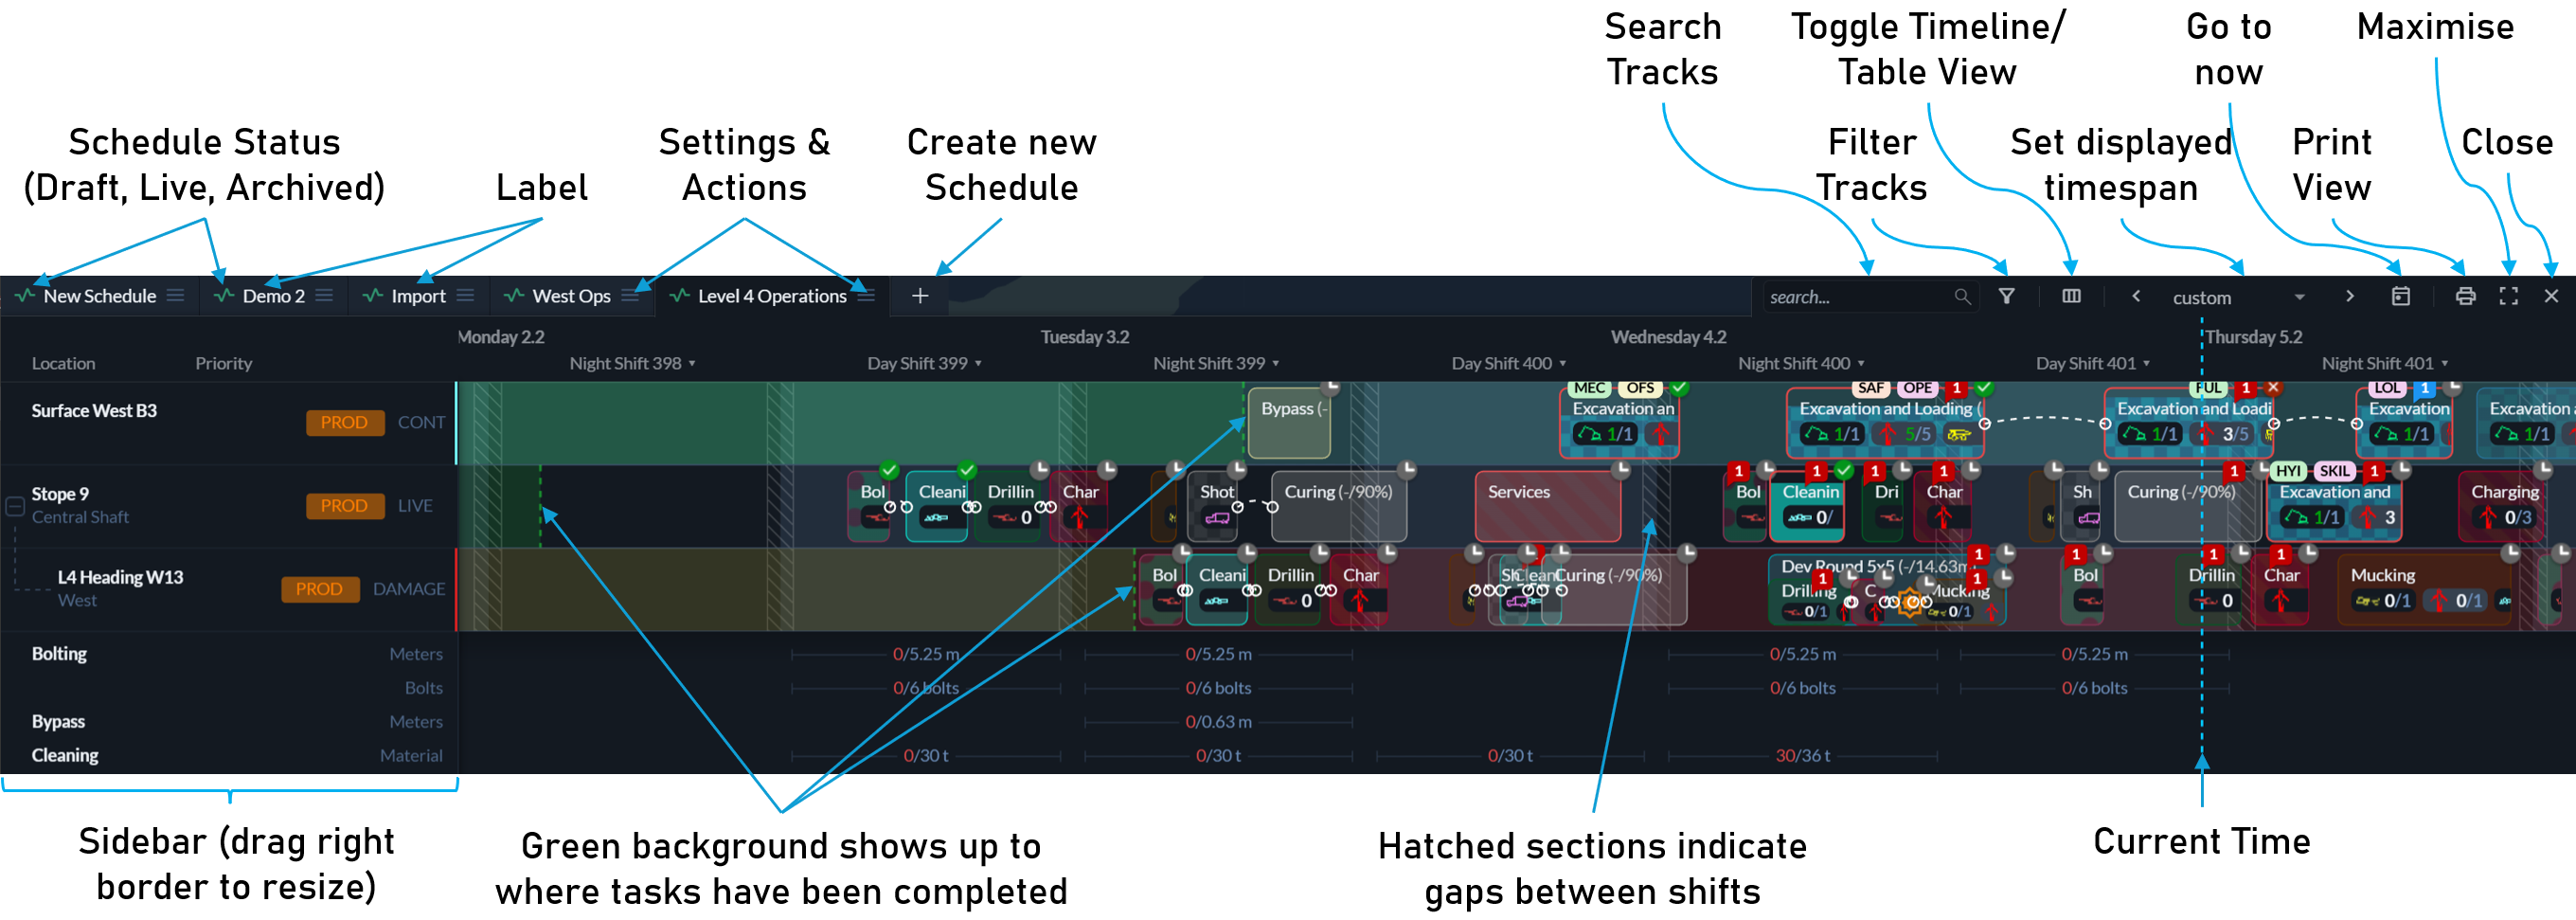
Scheduling panel header
The header is divided into two areas. On the left, it displays a tab for each schedule. On the right, it provides controls for interacting with the currently active schedule.
Schedule tabs
Each schedule tab shows the schedule’s status (Draft, Live, or Archived), its label, and a context menu. This menu allows you to configure, duplicate, archive, or delete the schedule. More details can be found in the Schedules section.
Header controls
Search
The search field allows you to search for locations within the schedule. Tracks whose locations do not match the search query are automatically hidden. Search uses fuzzy matching, so non-consecutive letter combinations are sufficient to find a match.
Filtering
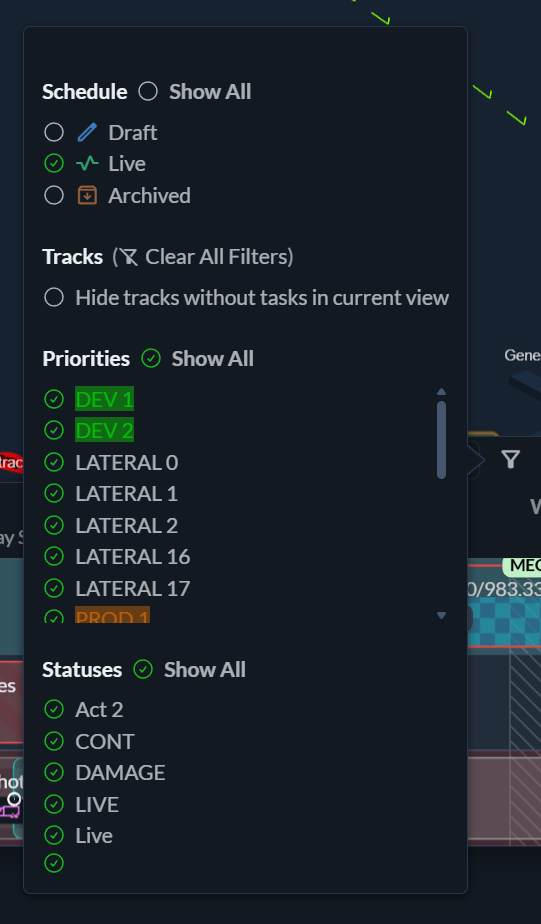
By default, only schedules with a Live status are shown. You can include Draft and Archived schedules using the filter menu.
The option Hide tracks without tasks in current view is particularly useful for large schedules where only a subset of locations is active at any given time. When enabled, tracks without tasks are automatically shown or hidden as you pan through time. If you want to add tasks to currently empty tracks, you must disable this option to make them visible again.
You can also filter tracks by priority and by free-text status values, making it easy to focus on specific parts of the operation.
Sorting
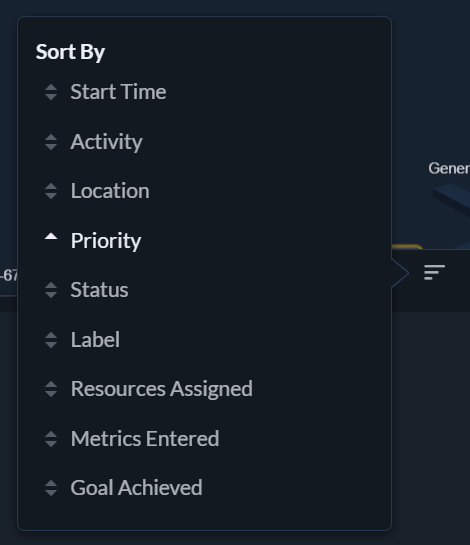
In table view, tasks can be sorted by time, activity, priority, resourcing status, and many other attributes.
Timeline and table view
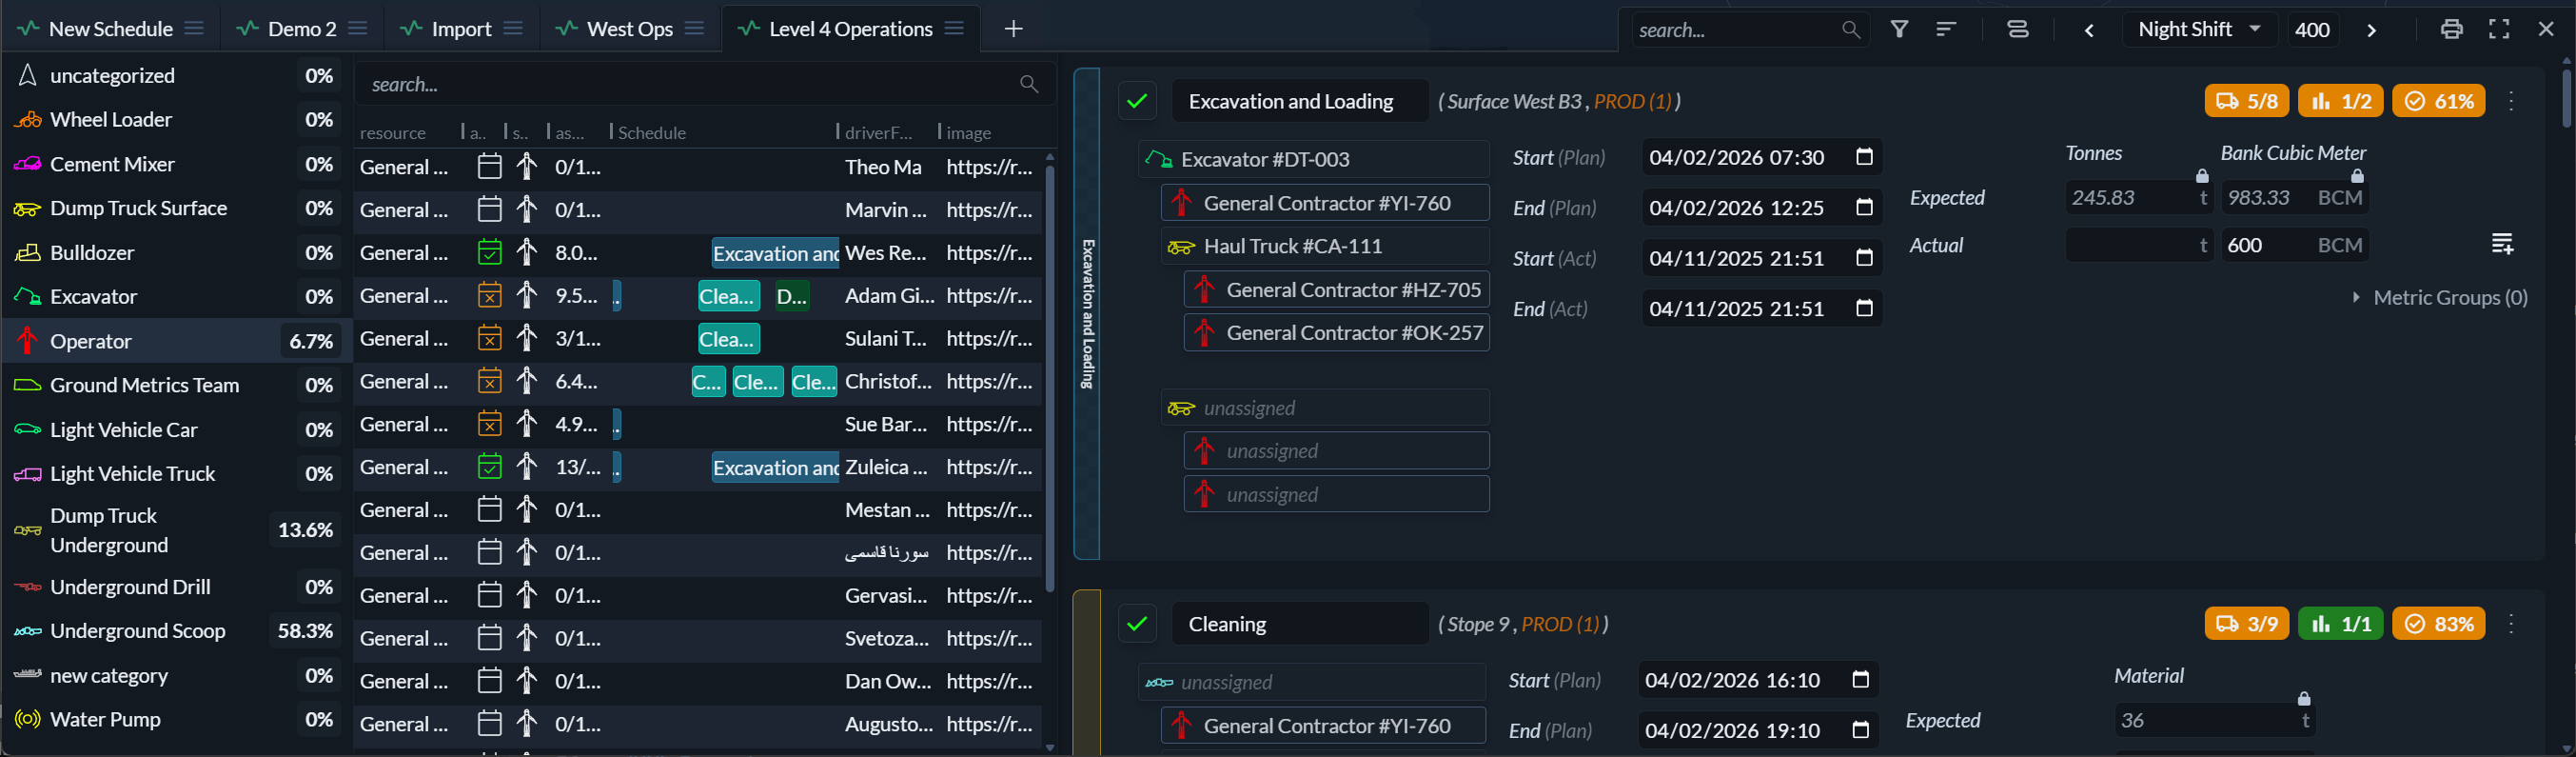
Schedules can be viewed in two different ways: Timeline view and Table view. You can switch between them using the view toggle icon in the panel header.
Timeline view displays tasks and events as swimlanes across time, grouped by location. It is best suited for planning, understanding parallel work, and adjusting task timing and structure.
Table view shows all tasks in the current shift in a tabular format. It displays required resources, metrics, and timing information. While both views support resourcing and metric entry, table view often provides more space and clarity for these tasks.
Table view also allows sorting by resourcing completeness, metric entry status, and goal achievement, making it easy to identify gaps and outstanding work.
Displayed time span
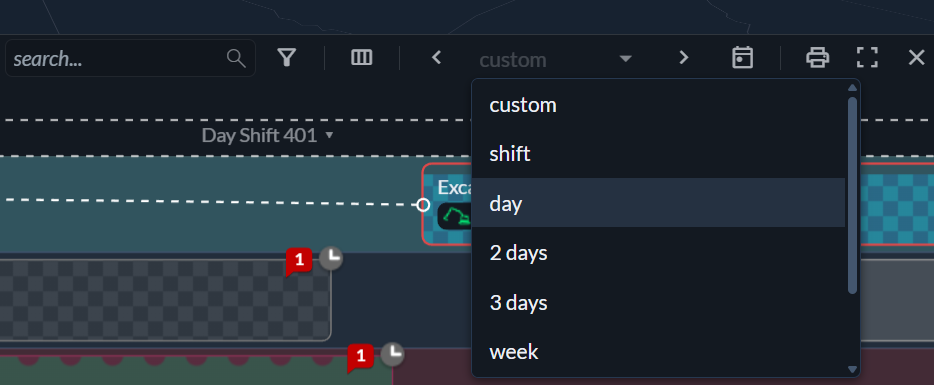
You can pan the schedule freely by holding down the right mouse button and zoom using the mouse wheel. Alternatively, you can set the displayed time span to a fixed window—such as a shift, day, or week—and move forward or backward using the arrow buttons in the time span control.
Jump to now
Clicking Jump to Now moves the schedule view to the current date and time.
Print view
Clicking the printer icon opens the schedule print view.
Maximise / minimise
The maximise icon toggles the scheduling panel between normal and full-screen modes.
Close
The close icon hides the scheduling panel.
Timeline view: sidebar
On the left side of the timeline view, the sidebar shows the hierarchy of tracks in the schedule. You can resize the sidebar by dragging its right edge. For more details on tracks and hierarchy, see the Tracks documentation.
Timeline view: interaction
In timeline view, the left mouse button is used for interaction. Hold the right mouse button to pan the view, and use the mouse wheel to zoom in and out.
As you move the cursor over a track, Hivekit shows the corresponding time and a guide line indicating where tasks or events can be scheduled. Clicking an empty area of a track opens the menu for adding a task.
Selection
A single task or event can be selected by clicking it. To select multiple items, draw a selection rectangle with the left mouse button or click items one by one while holding Shift.
To clear the current selection, right-click or press Escape.
Timeline view: progress indicators
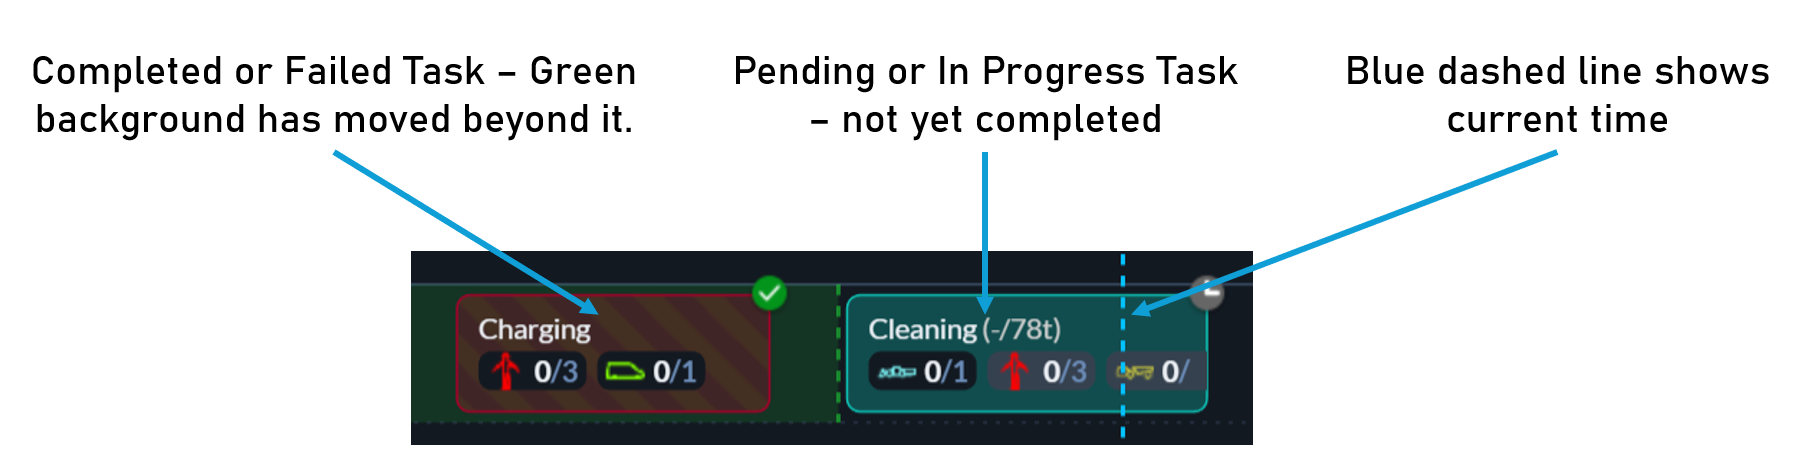
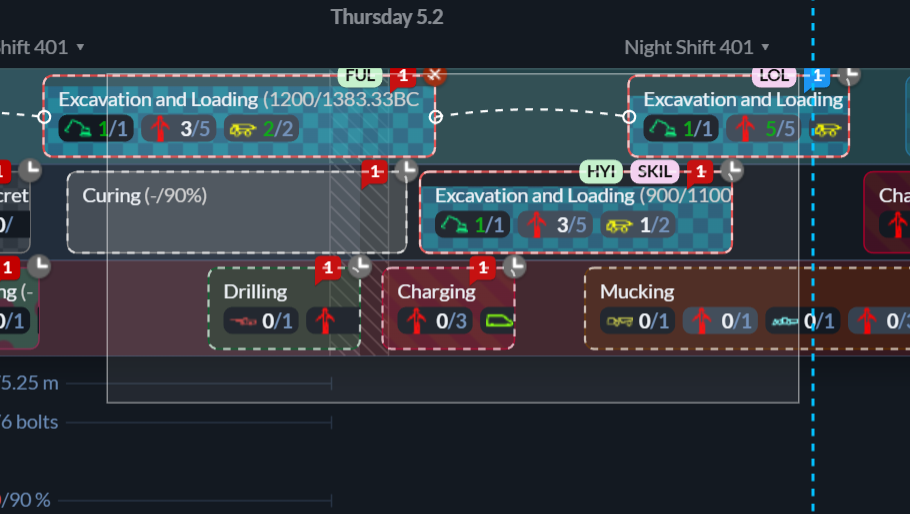
In timeline view, tracks show a green background up to the point where all tasks have been completed. This indicates the current progress of the shift. A blue dashed vertical line marks the current point in time and moves continuously.
To keep a shift on track, the green completion area should keep pace with the blue time indicator.