Shift Plan / Lineup
Once shift planning is complete—tasks are laid out, goals are defined, and people and vehicles are assigned—it’s time to brief the crew on who is doing what. Lineups are designed to make this clear, structured, and easy to communicate.
Displaying lineups
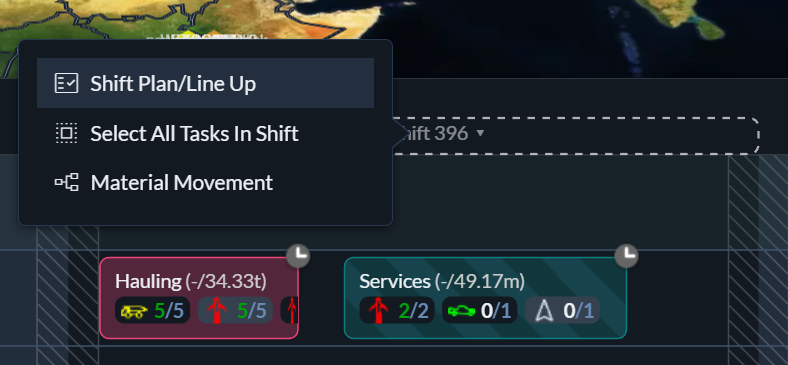
To open the lineup for a specific shift, click the shift header in the schedule’s timeline view and select Shift Plan / Lineup.
In the header bar, you can choose who the lineup should be shown for. Most commonly, this will be a people category such as operators or truck drivers, but you can also generate lineups for vehicle categories. You can even select a specific person or vehicle to see exactly which tasks and goals they are assigned for the shift.
Display options
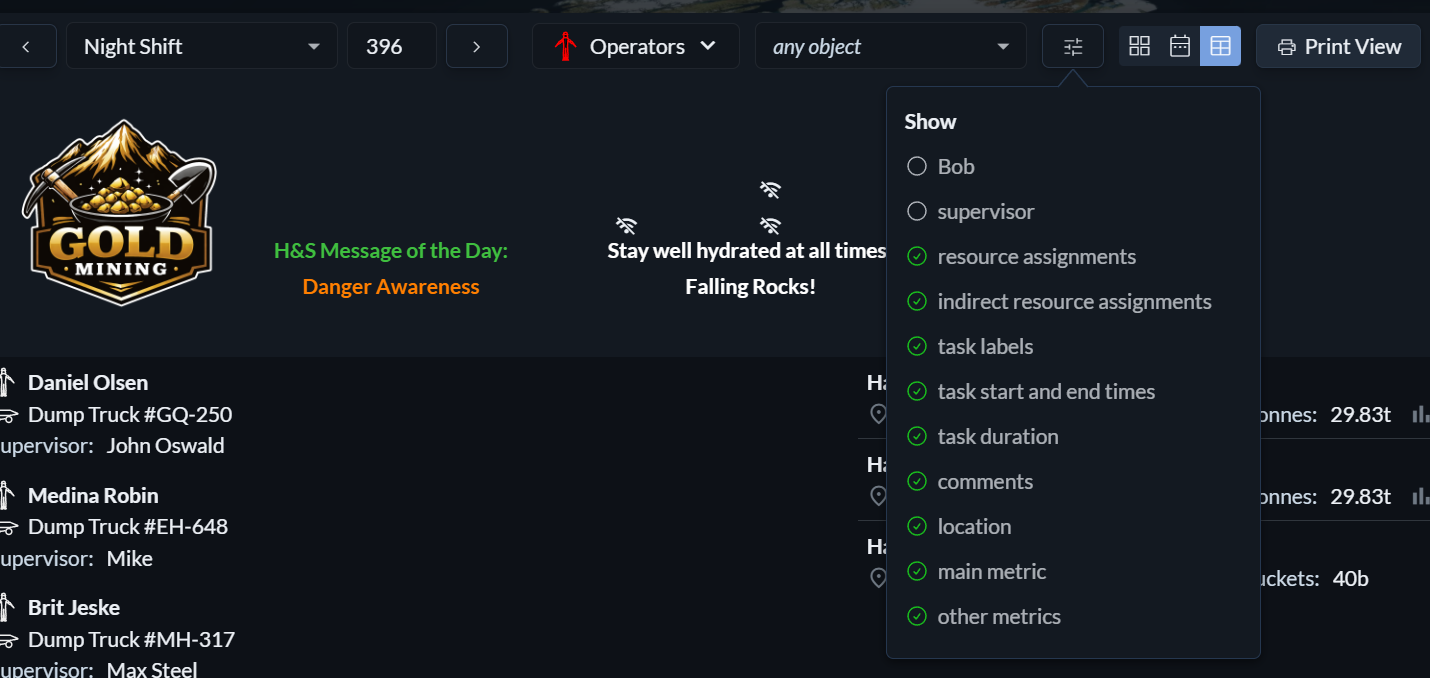
The Display Options menu allows you to control which information is shown in the lineup. From here, you can choose whether to include elements such as comments, task start and end times, transitive resources, and other contextual details.
This makes it easy to tailor the lineup to its intended audience—for example, keeping it concise for printouts or expanding it to include additional context for supervisors and planners.
Views

Lineups can be displayed in three different views. You can switch between them using the icons in the header bar.
Cards view
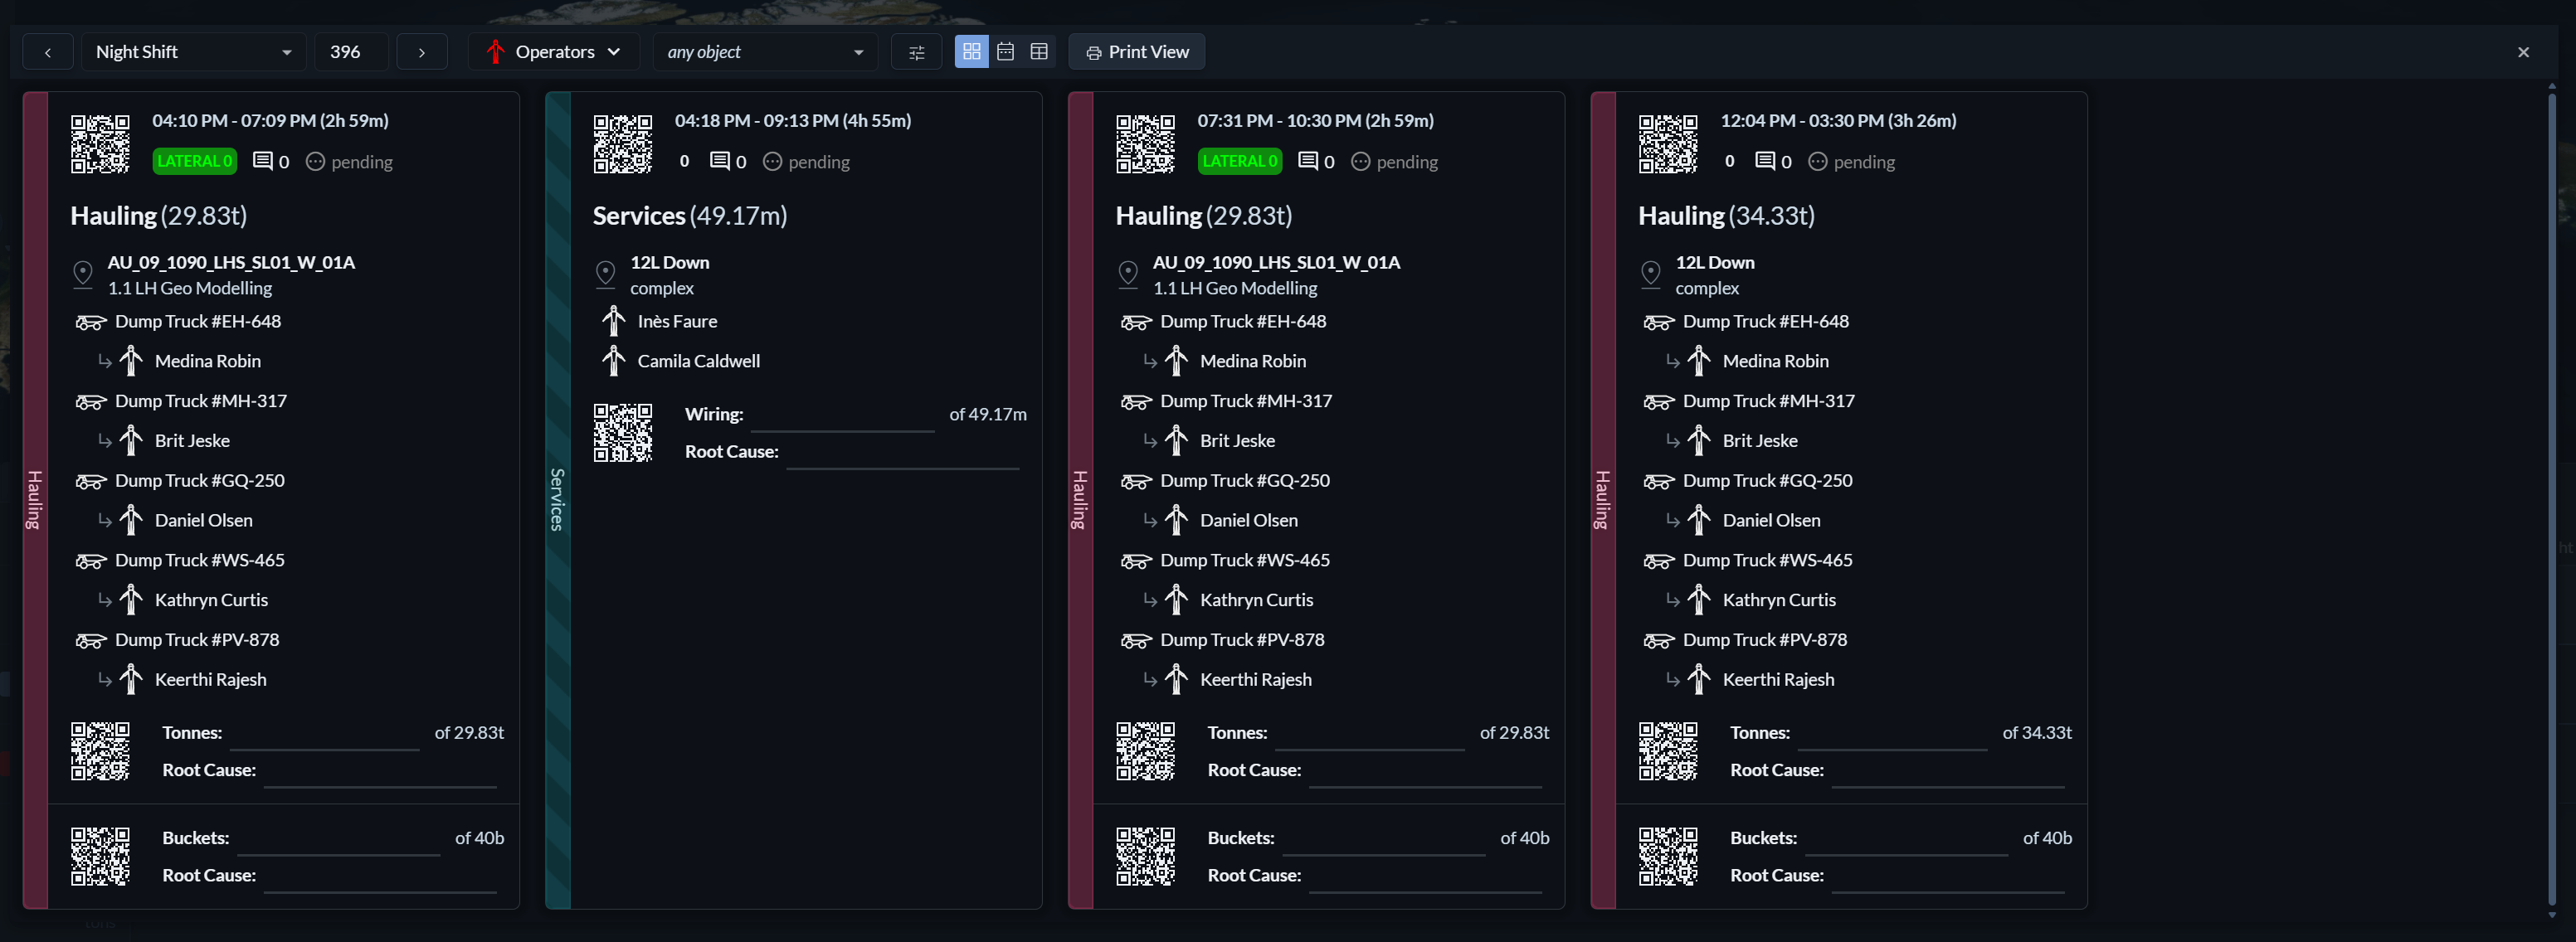
The cards view displays one card per task scheduled for the shift. Each card lists all resources assigned to the task and includes QR codes and dedicated lines for recording metrics.
This view is designed for environments where connectivity, tablets, or real-time reporting are limited or unavailable. Cards can be printed and handed to the crew or their supervisor. After completing the task, metrics can be written directly on the card. At the end of the shift, the cards are collected and scanned, and Hivekit automatically records the metrics and results.
This is an effective bridge solution for low-tech or low-connectivity environments, but it requires additional setup. If you are interested in using this feature, please contact your Hivekit representative for assistance.
Timeline view
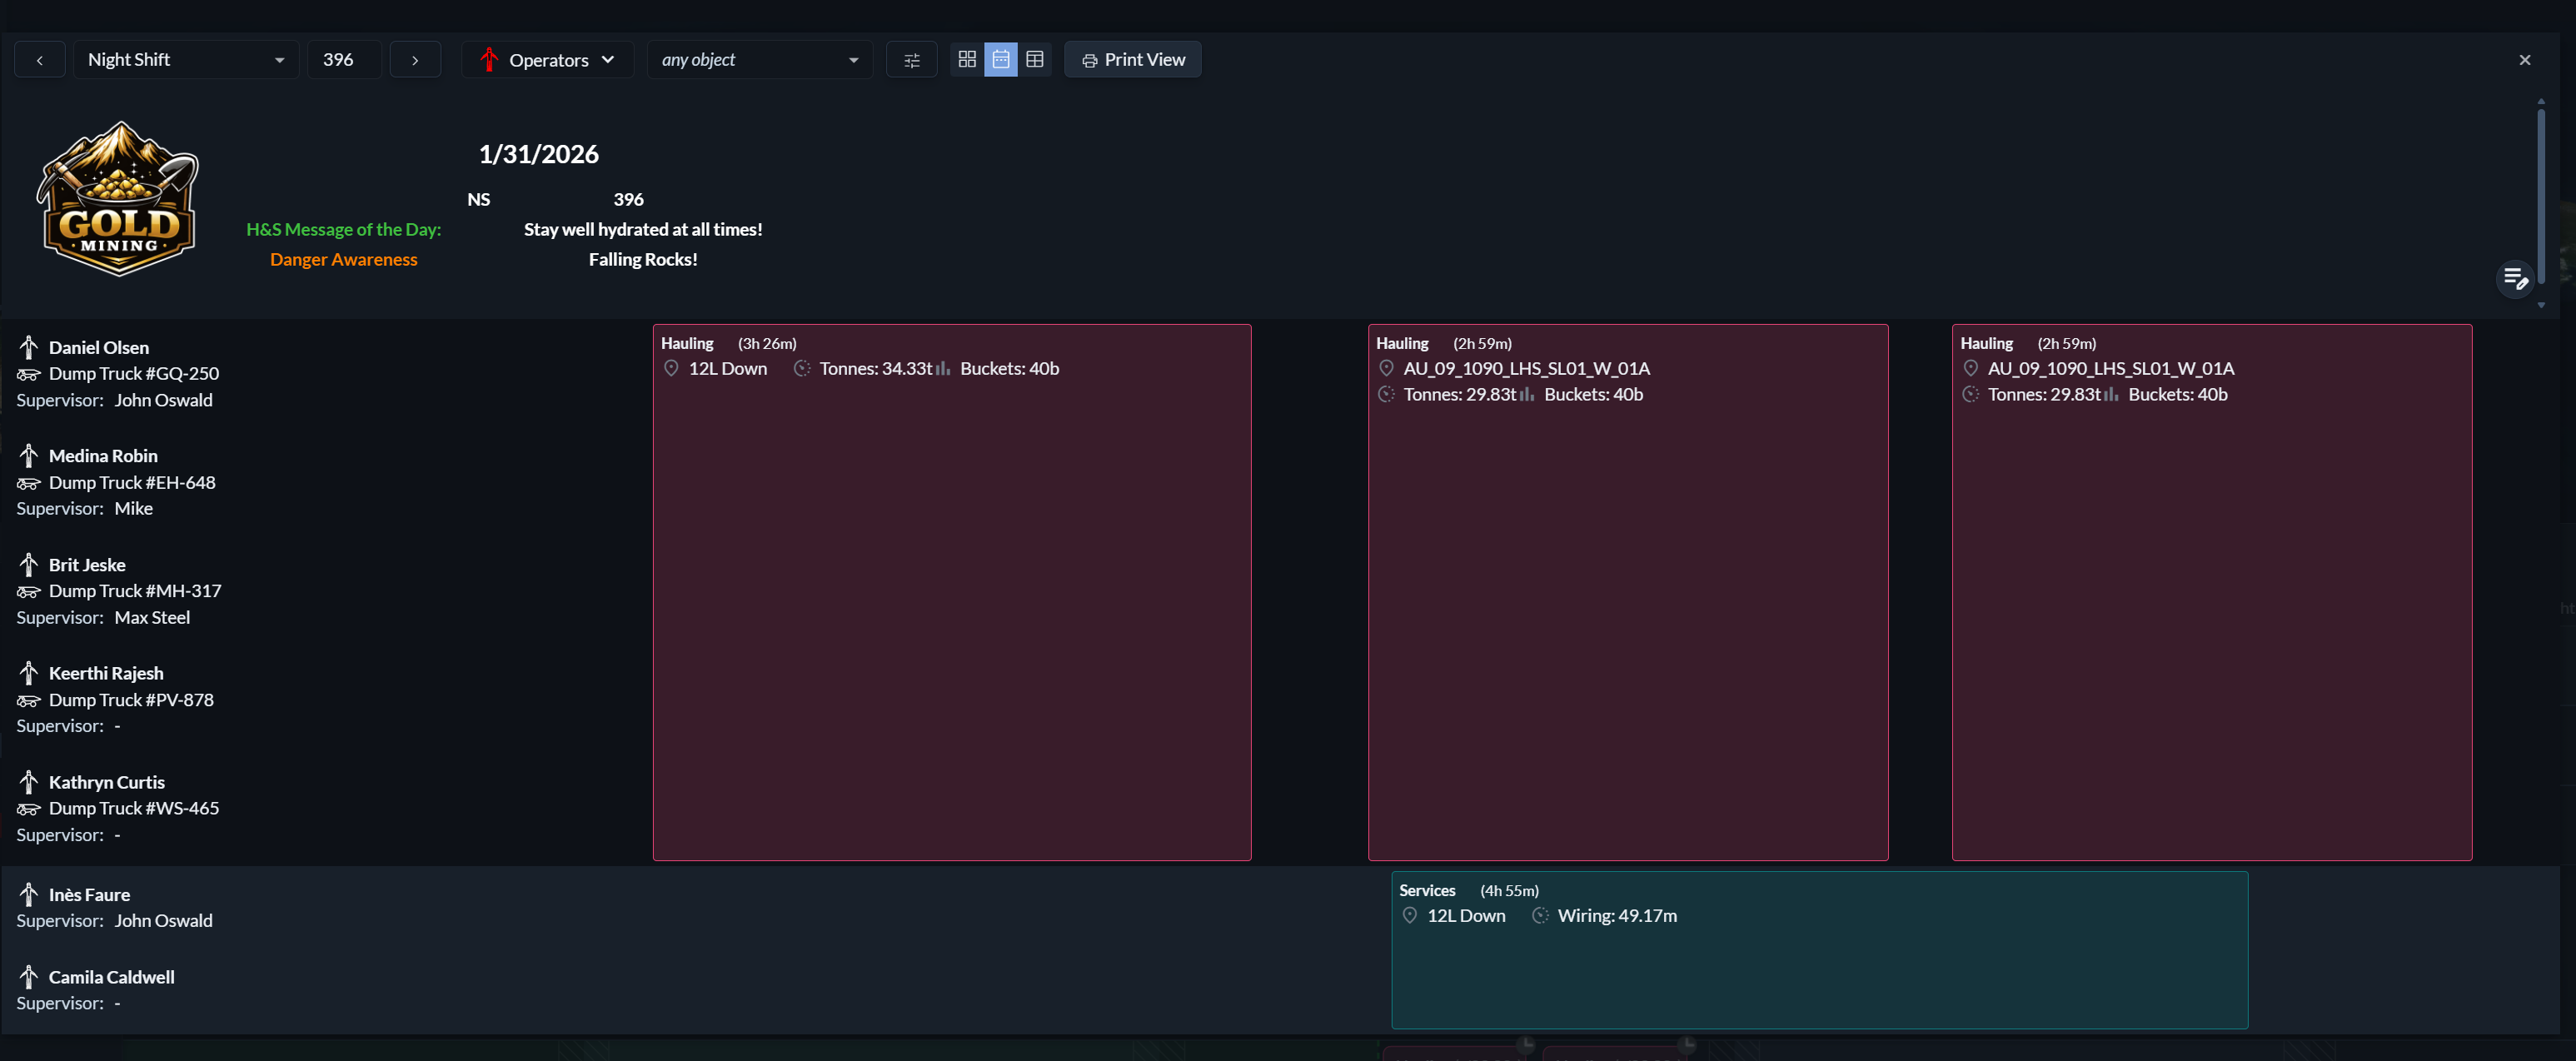
The timeline view combines individual resources or teams with a simplified timeline. It shows which tasks each person, team, or vehicle is expected to perform over the course of the shift, in a format similar to the schedule itself.
Table view
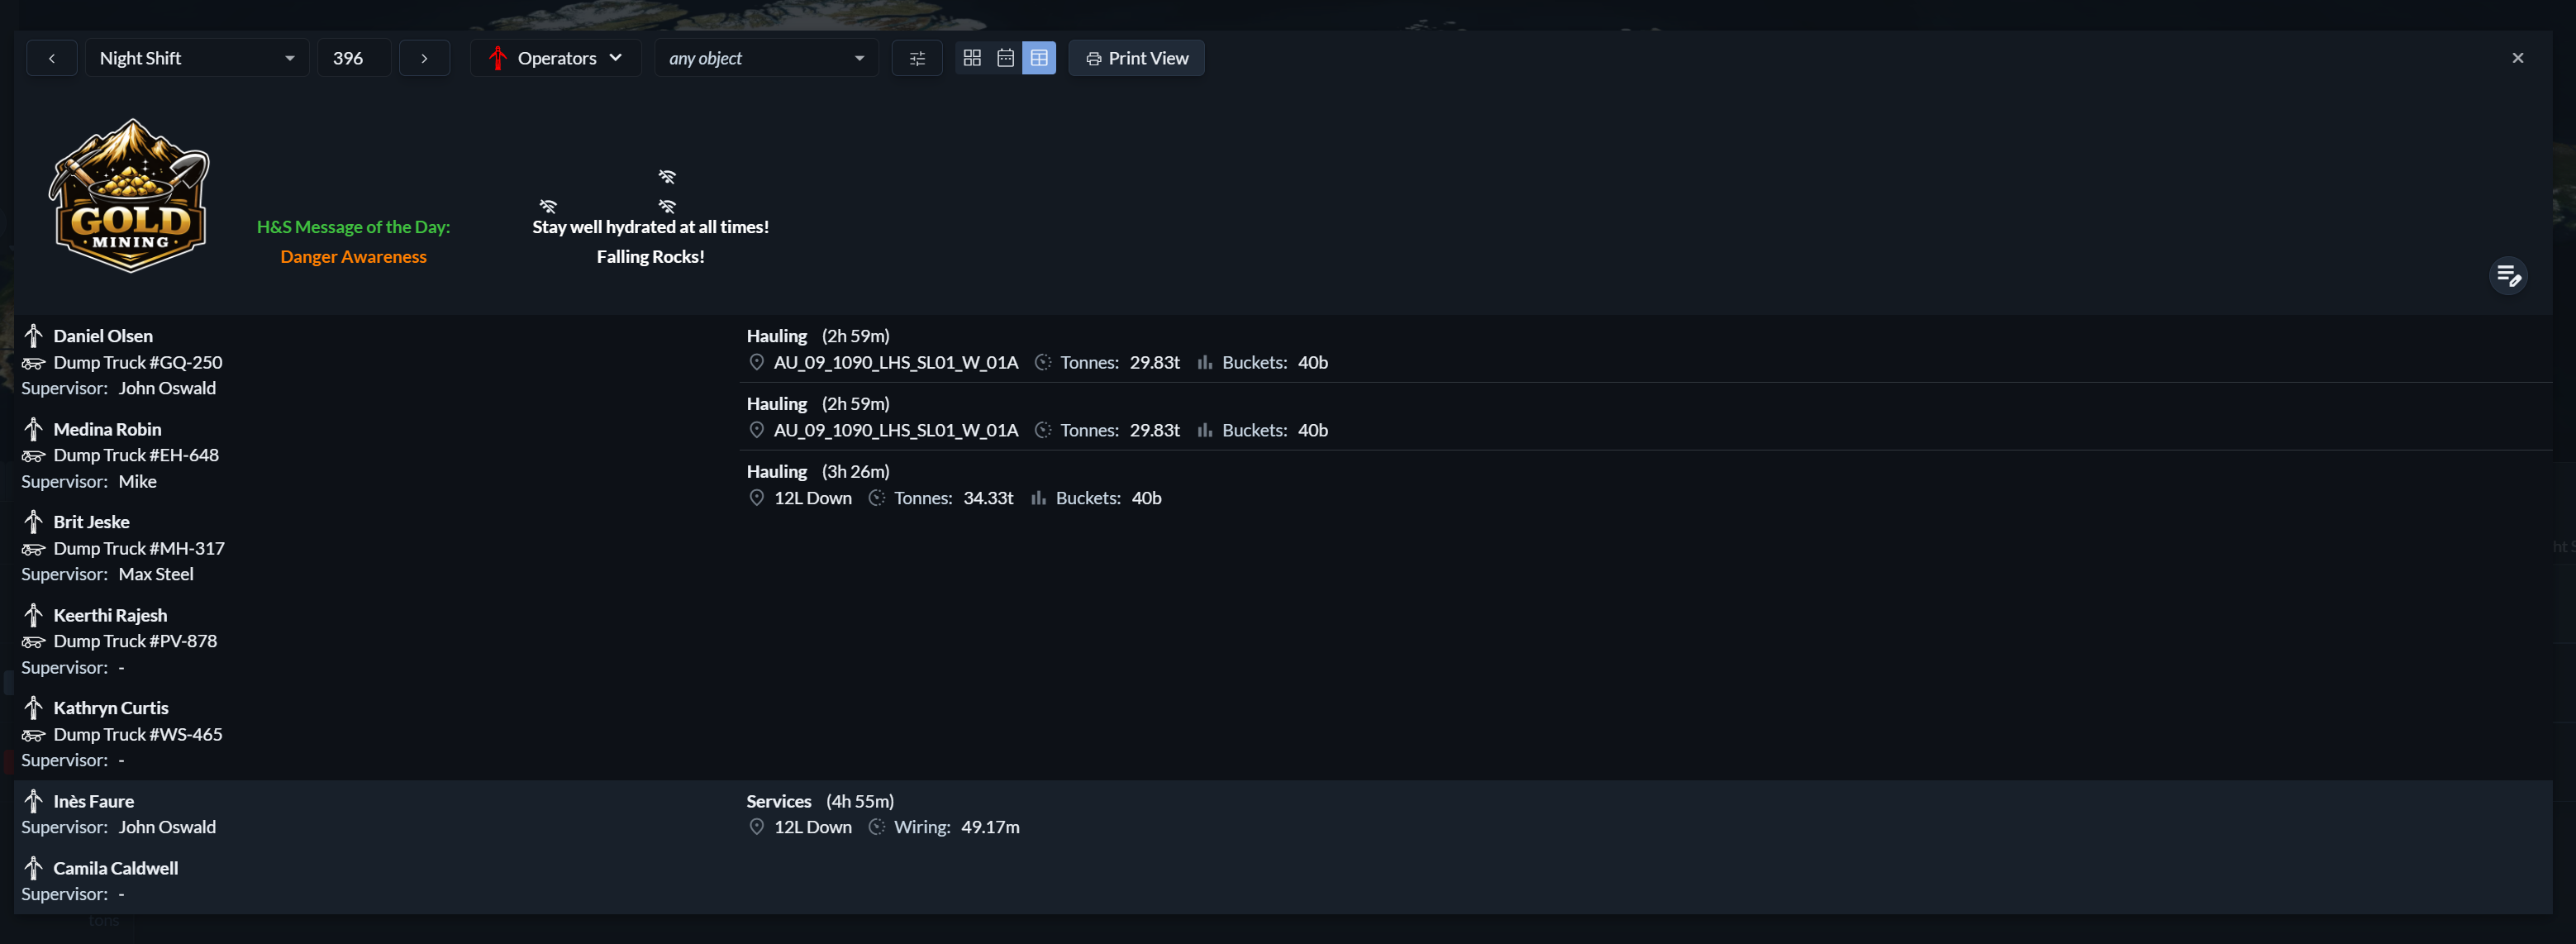
The table view presents a compact list of people, tasks, and goals. It is optimised for readability and printing and works well as a concise shift overview.
Print header area
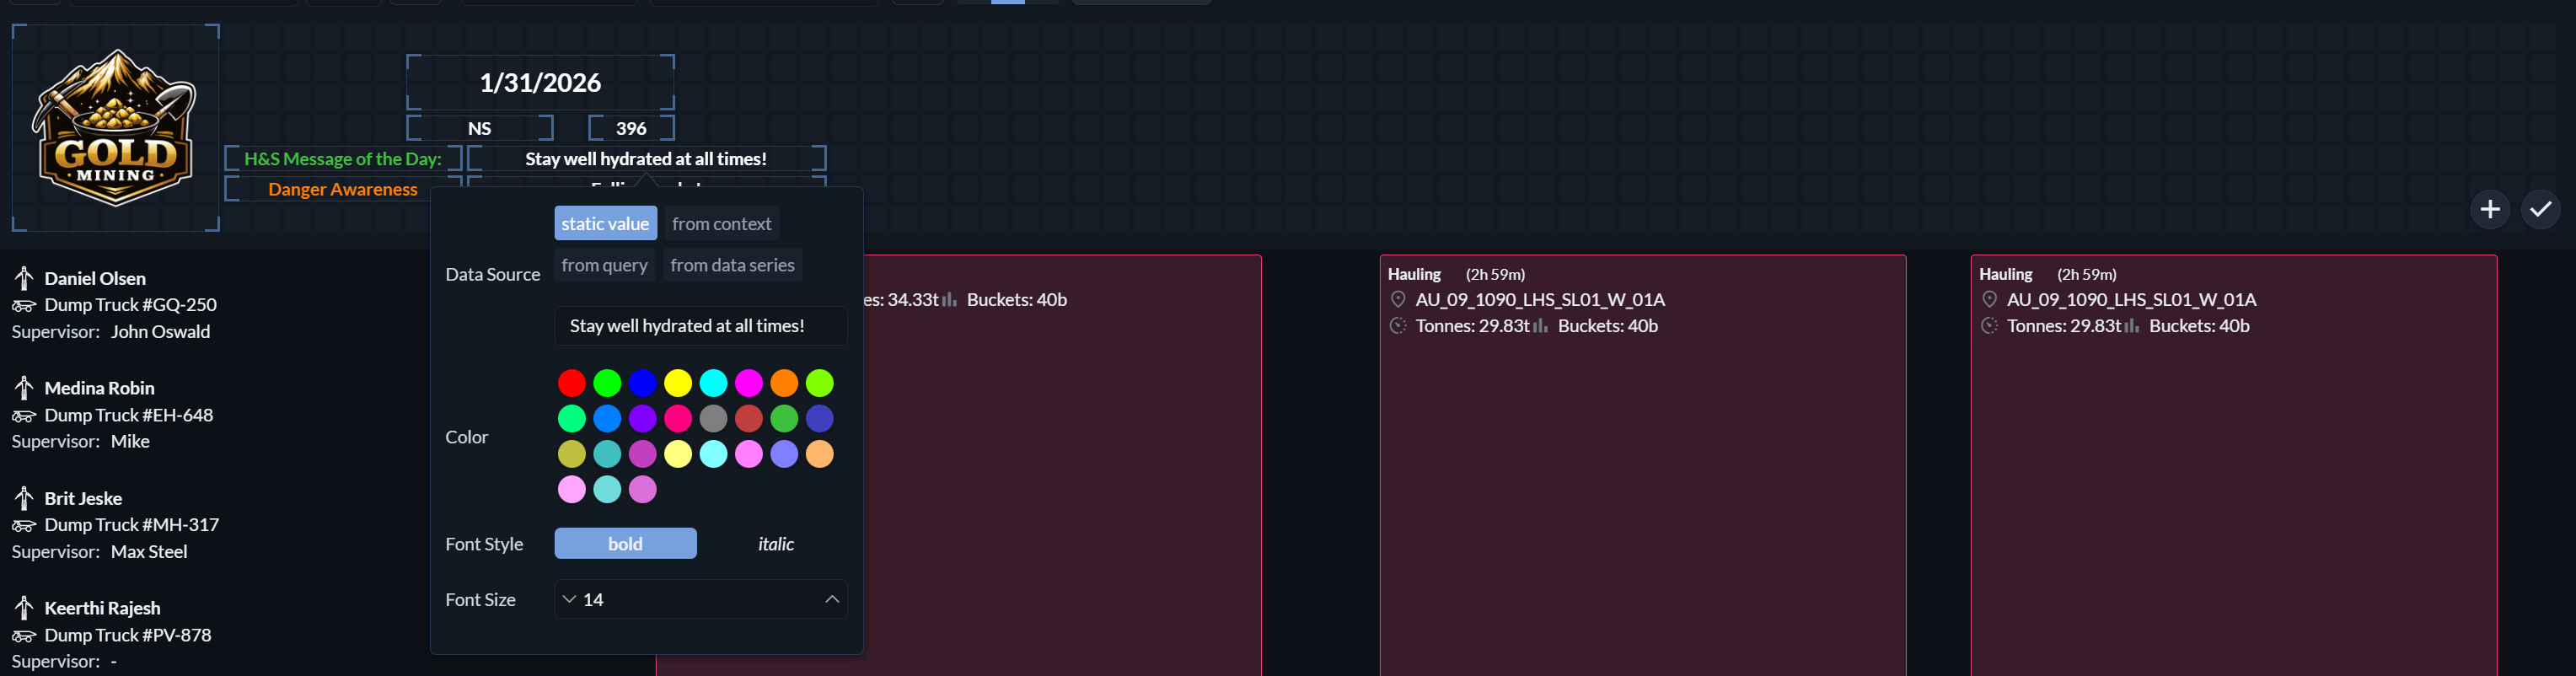
Above the timeline and table views, you will find an optional header area. This space can be used to add logos, general information, or data pulled from other parts of Hivekit, such as site-wide safety notes, notable events, or special instructions for the day.
Hivekit automatically adjusts the size of this header to its content. If the header is left empty, it is omitted entirely from the printed output.
Print view
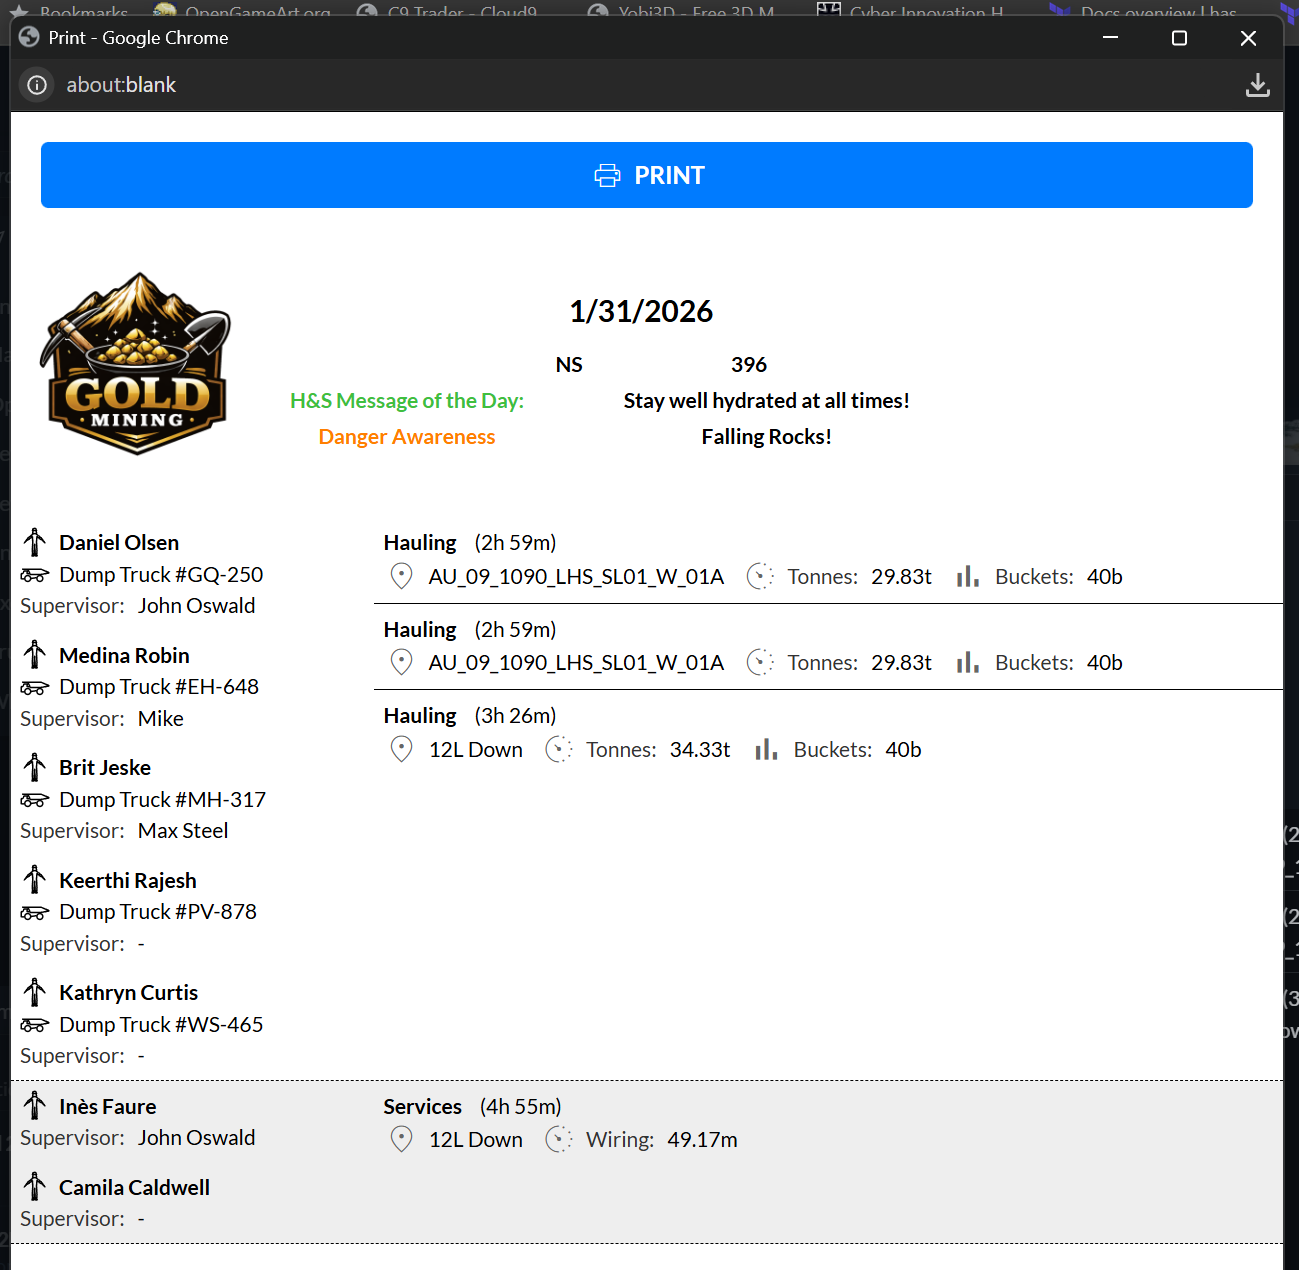
To print a lineup, click Print View. This opens a new window with a print-optimised version of the lineup. If the window does not appear, your pop-up blocker may be preventing it from opening. Use the print button in the new window to produce the physical lineup.