Schedules
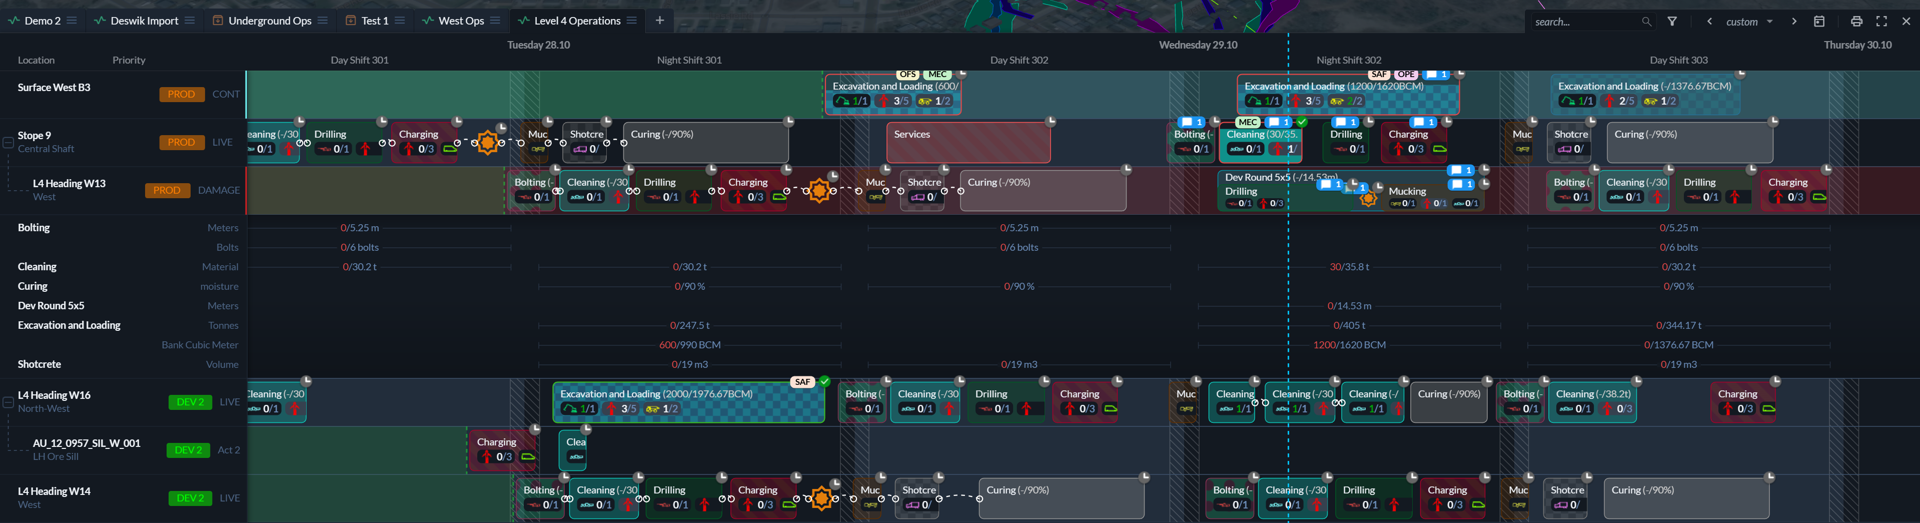
A schedule is used to plan workstreams across people, equipment, and locations. Schedules can be organised by days, shifts, or any other cadence that matches how your operation runs. Hivekit is designed to handle very large schedules, spanning multiple years or hundreds of locations, while only loading and rendering the data that is currently visible on screen.
How should I structure my schedules?
Although Hivekit has no technical limitations on schedule size, very large schedules can become difficult to manage from an organisational perspective. For this reason, we generally recommend creating one schedule per operational area.
For a mining site, this often means separate schedules for operations, maintenance, and processing. For field operations, it may make sense to create one schedule per district or region. This approach keeps responsibilities clear, simplifies planning, and reduces the risk of conflicts.
Should I limit schedules by time?
Schedules can either be finite, such as weekly or bi-weekly schedules, or continuous, with no defined end date. The right choice depends on how your planning process works.
If your operation follows a clear lifecycle—where planners create a draft schedule, supervisors add detail, operators execute the work, and clerks validate completion and metrics—it often makes sense to create a new schedule for each planning cycle. If, on the other hand, you run a continuous operation such as logistics or ongoing field services, a single long-running schedule is often easier to manage.
Both approaches are fully supported by Hivekit.
Are resources shared across schedules?
Yes. Resources are tracked globally across all schedules. If a truck, machine, or person is assigned to a task in one schedule, it will not be available for assignment in another schedule during the same time period. This prevents double-booking and reflects real-world availability.
Creating a schedule
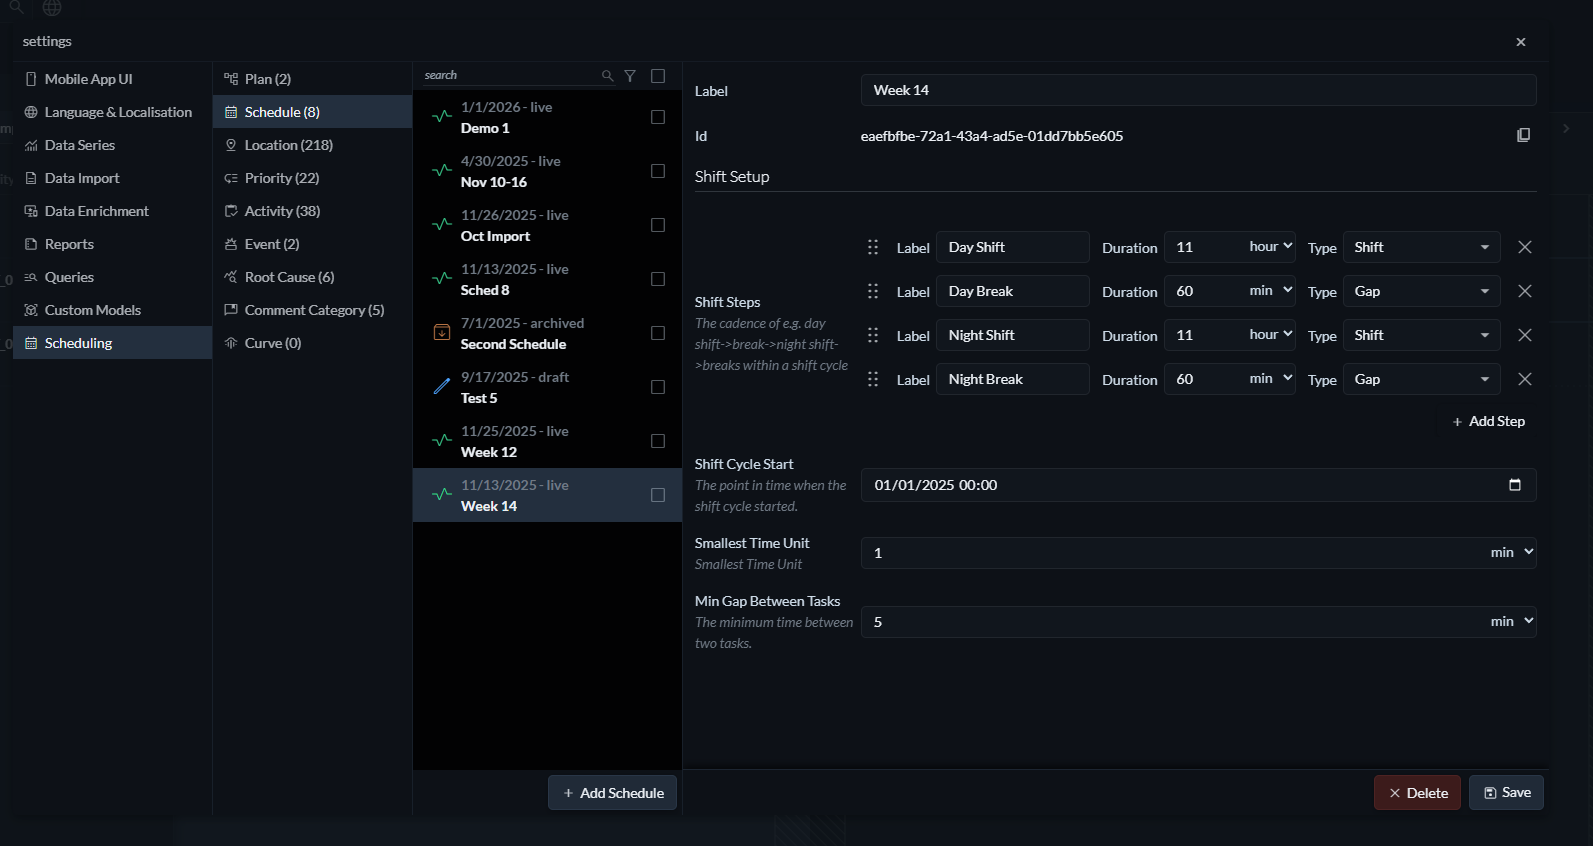
To create a schedule, open the Settings menu by clicking the three parallel lines on the right of the screen, select "Scheduling", then "Schedule". Each schedule requires a label and a definition of its shift steps.
Shift steps
Shift steps define the cadence of your schedule and describe how time is divided into shifts and gaps.
If you do not operate with shifts, you can simply create a single step called “Day”, set its type to “Shift”, and give it a duration of 24 hours.
If you operate with shifts and breaks, define each shift and gap explicitly. For example, for 11-hour day and night shifts with a one-hour break between them, you would create a day shift, a day break, a night shift, and a night break, each with the appropriate duration. Hivekit will repeat this sequence continuously.
Shift cycle start
The shift cycle start defines the exact point in time when your shift pattern begins. From this moment onward, all shifts and gaps repeat according to the defined steps. Hivekit also assigns sequential numbers to shifts automatically, which simplifies tracking, reporting, and later analysis.
Smallest time unit
The smallest time unit defines the time resolution of the schedule. Tasks cannot be started, ended, or moved in increments smaller than this value. For example, with a smallest time unit of five minutes, tasks can start at 12:00, 12:05, or 12:10, but not at 12:03. The schedule cursor automatically snaps to this resolution.
Minimum gap between tasks
This setting defines the minimum amount of time that must exist between two tasks. Set it to zero if tasks are allowed to follow each other directly, or increase it if setup time, travel time, or safety buffers are required between tasks.
Duplicating schedules
 When schedules follow a recurring structure or differ only slightly from one planning cycle to the next—for example, weekly schedules—it is usually more efficient to duplicate an existing schedule rather than create a new one from scratch.
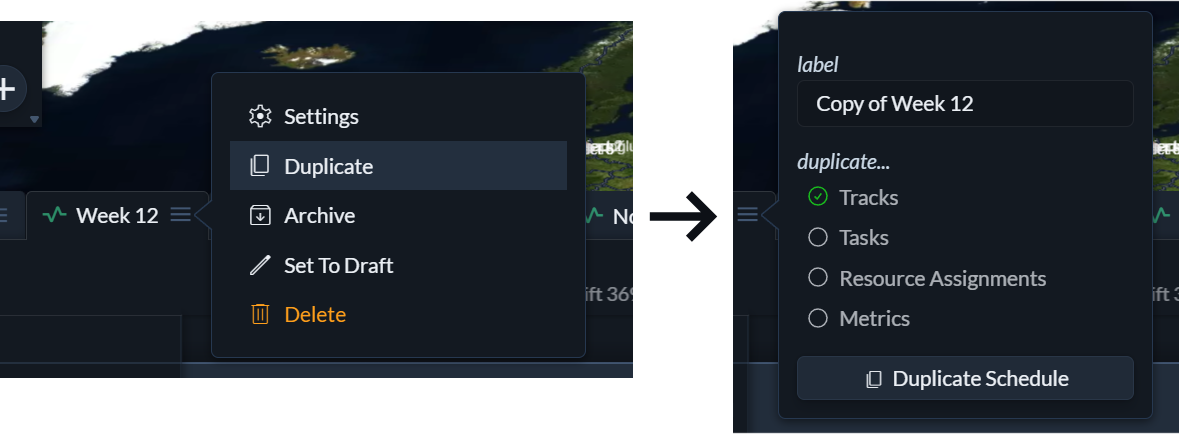
To duplicate a schedule, click the three horizontal lines in the schedule tab and select Duplicate. You can then choose which parts of the original schedule should be carried over to the new one.
-
The shift setup is always duplicated. This includes the shift cadence, shift cycle start, minimum gap between tasks, and the smallest time unit.
-
Tracks can be duplicated to preserve the structural layout of the schedule.
-
Tasks can be duplicated to create new task instances based on the original schedule.
-
Resource assignments will automatically enable task duplication and assign the same resources to the newly created tasks as were assigned in the original schedule.
-
Metrics can be duplicated to copy any recorded metric values from the original tasks to their duplicated counterparts.
Schedule status
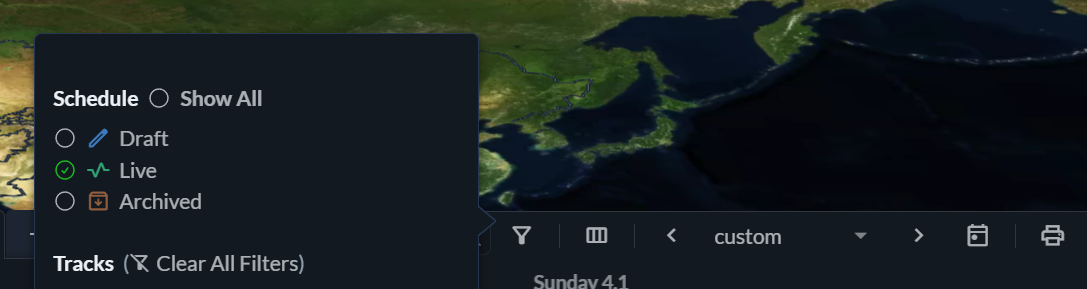
Schedules can be in one of three states: Draft, Live, or Archived. Newly created schedules default to Live, but can be set to Draft while they are still being prepared or reviewed. Once a schedule is no longer actively used, it can be archived.
By default, only Live schedules are shown as tabs above the scheduling panel. To include Draft or Archived schedules, click the filter icon and select which schedule states you want to display.
Archiving and deleting schedules
If a schedule is no longer needed but should be retained for reference or auditing, it can be archived by clicking the three horizontal lines in the schedule tab and selecting Archive. Archived schedules are removed from the schedule tabs unless they are explicitly enabled in the schedule filters, but all data is preserved and the schedule can be restored at any time.
Alternatively, schedules can be deleted. Deleting a schedule permanently removes the schedule, all of its tasks, and any recorded metrics. This action cannot be undone and should be used with care.