Embedding Hivekit into your App
This tutorial will guide you through the process of embedding Hivekit into your app. This includes:
- Loading Hivekit inside an iFrame
- Authenticating Hivekit from your User Management System
- Interacting with Hivekit from your App
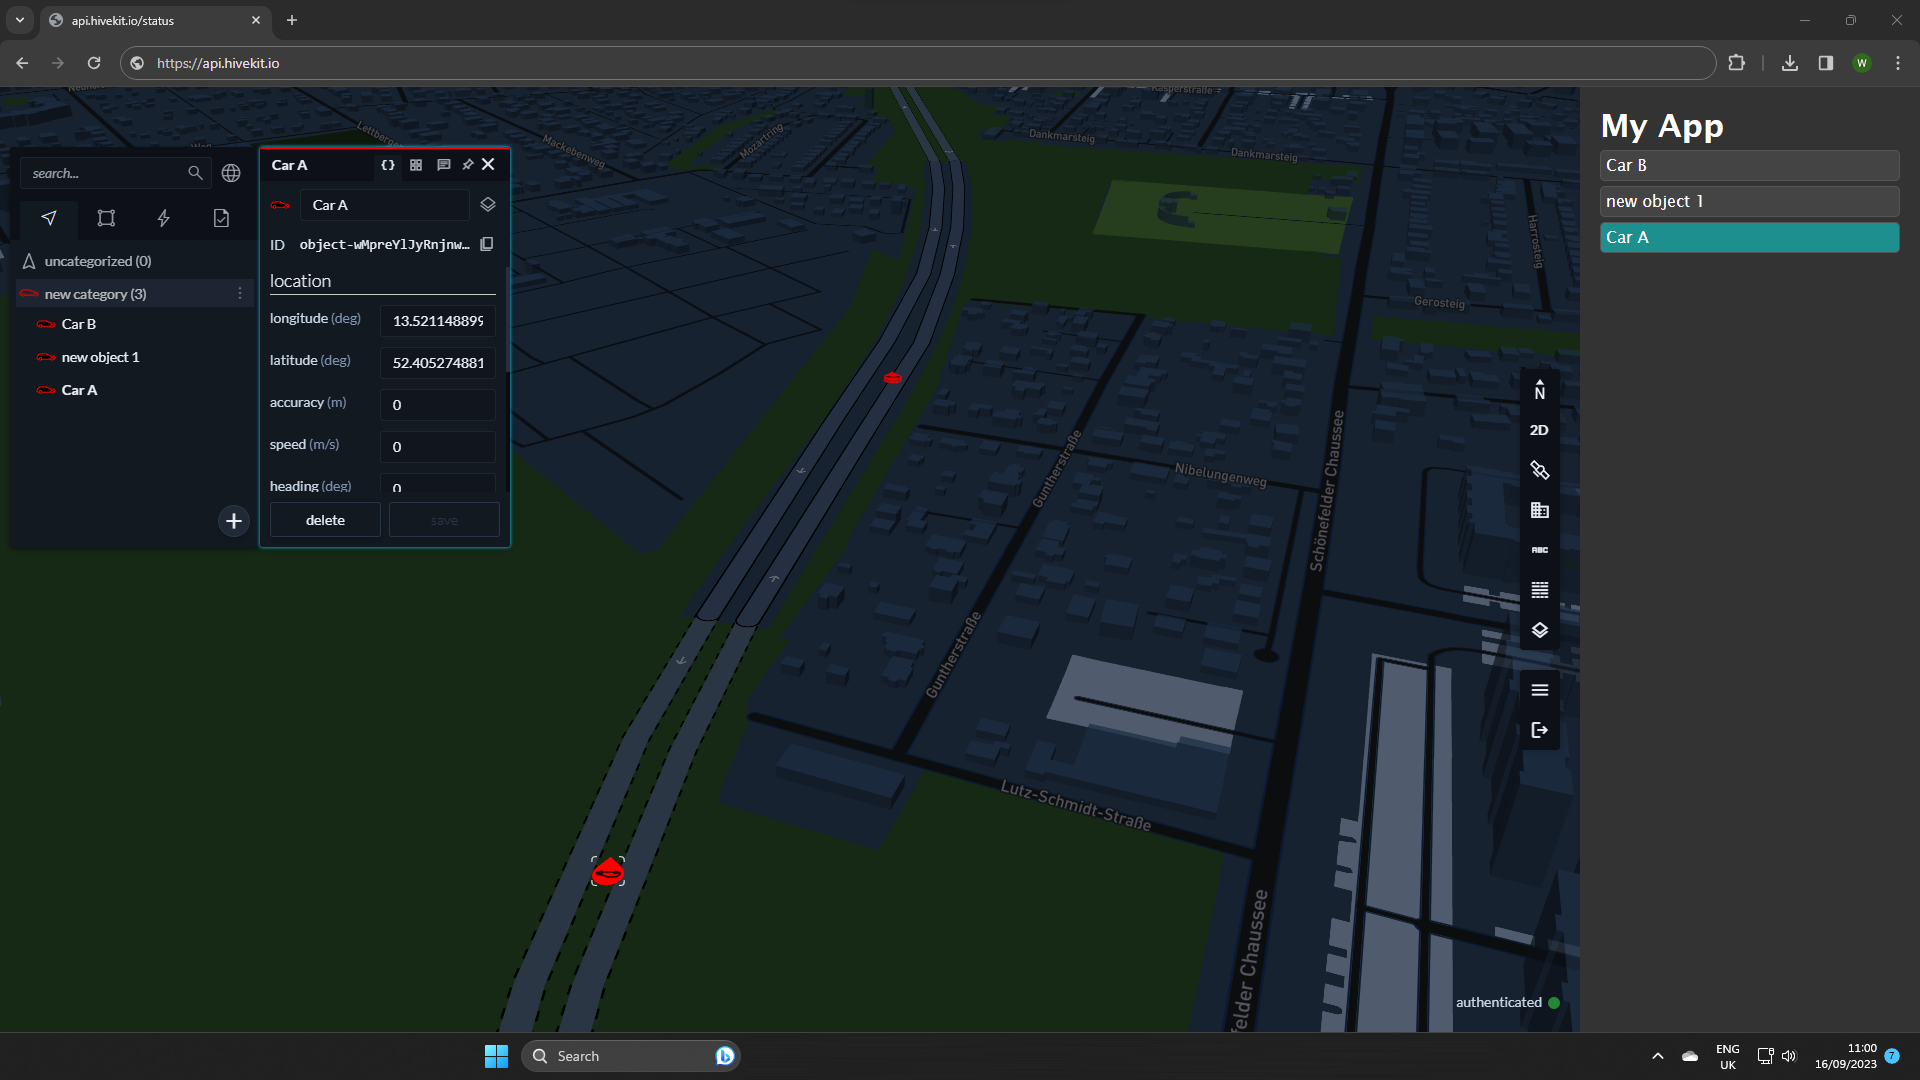
The outcome will be a simple app with an embedded Hivekit realm that is authenticated and interacts with your app. You will be able to list the objects in the realm, click on them to select them in the app and show Hivekit's active selection in your app.
Prerequisites
- A Hivekit account
- Embedding enabled
Embedding in Hivekit is blocked by default - to enable it, please contact us and share your use case.
Github
You can find the code for this tutorial on Github here.
Video
If you don't want to read through the tutorial, you can watch the video instead:
Step 1: Load Hivekit inside an iFrame
Create an iFrame element and set its src attribute to
`https://realm.hivekit.io/?realm=${realmId}&token=${token}`
where realmId is the id of the realm you want to embed and token is an authentication token that you generate in the next step.
Step 2: Authenticate Hivekit from your User Management System
You can either create a static token in the "Tokens" section of Hivekit's Access Management page or generate a token dynamically by signing a JWT with your secret key. Here's an example of how to generate a token in Node.js:
import jwt from 'jsonwebtoken'

const userId = 'YOUR_USER_NAME'; // Just use to address the user, can be anything
const secret = 'YOUR_SECRET'; // Click show secret at https://hivekit.io/account/#/access-management to get the secret
const secretId = 'YOUR_SECRET_ID'; // That's the secret id from https://hivekit.io/account/#/access-management
const tenantId = 'YOUR_TENANT_ID'; // That's the Organisation ID from https://hivekit.io/account/#/tenant

const options = {
    issuer: 'platform.hivekit.io',
    keyid: secretId,
    jwtid: 'app-token'
}
const payload = {
    sub: userId,
    exp: Math.floor(Date.now() / 1000) + 60 * 60 * 24 * 2, // 2 days
    tnd: tenantId
}

// The secret is Base64 encoded
const token = jwt.sign(payload, Buffer.from(secret, 'base64'), options);
Step 3: Subscribe to objects inside the realm
Depending on your usecase, you already have a list of objects you wish to interact with. For our example, we want to show an up to date list of selectable vehicles. To do this, we'll create a subscription to all objects in the realm. This is covered in much more detail in the Subscriptions section of the documentation.
this.hivekitClient = new HivekitClient();
await this.hivekitClient.connect('wss://api.hivekit.io/v1/ws');
await this.hivekitClient.authenticate(token); // use the same token
this.realm = await this.hivekitClient.realm.get(realmId);
this.subscription = await this.realm.object.subscribe({ executeImmediately: true })
this.subscription.on('update', objects => {
    // update the objects in your app
});
Step 4: Interact with Hivekit from your app
Hivekit provides a library that let's you interact with Hivekit instances running in an iFrame - or with a parent instance if your app runs inside an iFrame within Hivekit. You can get it from npm via npm install @hivekit/external-app-control.
Using this library, we'll highlight an object in our app whenever the selection in Hivekit changes:
// Connect the ExternalAppControl to the iframe
this.hivekitApp = new ExternalAppControl(this.$refs.iframe);

// and react to selection changes in the app
this.hivekitApp.selection.on('change', (type, id) => {
    if (id === null) {
        this.$data.selectedObjectId = null;
    }
    else if (type === 'object') {
        this.$data.selectedObjectId = id;
    }
});
and we can add a click handler that selects the object in Hivekit when the user clicks on it in your app:
setSelection(id) {
    this.hivekitApp.selection.select('object', id)
}
Conclusion
This covers the basics. Of course, you can build much more complex workflows. We are constantly extending the functionality of Hivekit and making it available via the external app control library. Please find the complete code for this example on Github and, of course, if you have any questions or need help, please contact us or join our discord server.