Using the HTTP REST API
Hivekit provides a RESTful HTTP API that makes it easy to manage objects, areas, instructions and all other Hivekit concepts from any HTTP environment. You can find its full documentation here. Due to the request-response nature of HTTP, this API does not support subscriptions and realtime data feeds. For these, we recommend an official Hivekit SDK or the use of the Websocket API instead.
Alright, let's get started. If you prefer to watch this tutorial as a video, you can do so below. Otherwise, keep reading for the text version.
Concepts
Before we start, let's quickly review the two concepts we'll be working with.
-
A realm is a space within which something happens, e.g. a city or a building. Realms serve as containers for all other concepts - your vehicles, areas, instructions and tasks all live within the scope of a realm.
-
An object is a physical or virtual entity that can be tracked and managed. This could be a vehicle, a person, a sensor, a package, a building, a piece of equipment, or anything else you want to keep track of. Objects have a location and optional data.
What we want to do
In this tutorial, we'll
- sign in to Hivekit
- get an API Endpoint URL, Token and Realm ID
- create a new object via HTTP request
- check our new object on Hivekit's Map View
- read the object
- update the object
Step 1: Sign in to Hivekit
Start by logging into your Hivekit account. If you don't have an account yet, you can sign up for free at https://hivekit.io/signup/.
When you first sign up, Hivekit will automatically create an initial realm and an open access token.
Step 2: Look up the create object request
For this tutorial, we want to create an object within our realm that represents a delivery driver. So let's start by looking up the create object request in the HTTP API documentation.
Here, we learn that the request is a POST request to the https://api.hivekit.io/v2/realm/[realmId]/object/[objectId] endpoint. The request body should contain a label to identify the object as well as a location and optional data.
To authenticate our request, we also need an access token. You can pass this token as a query parameter, header or as part of the payload. For this tutorial, we'll pass it as a Authorization: Bearer <token> header.
Step 3: Gathering the necessary information
We need to gather the following information:
- The Realm ID
- The Access Token
- The Object ID
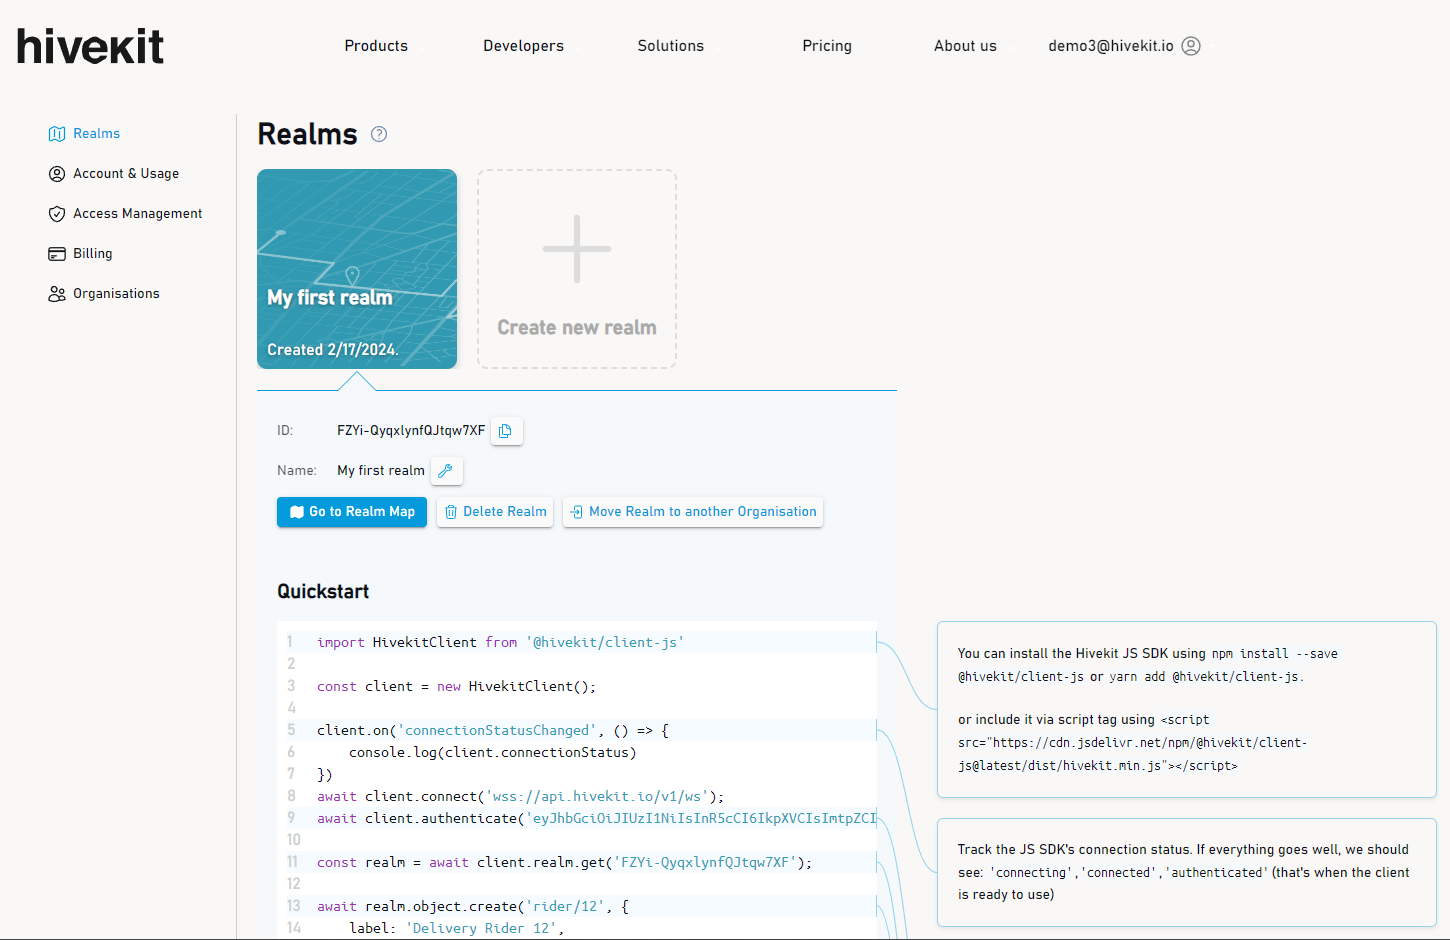
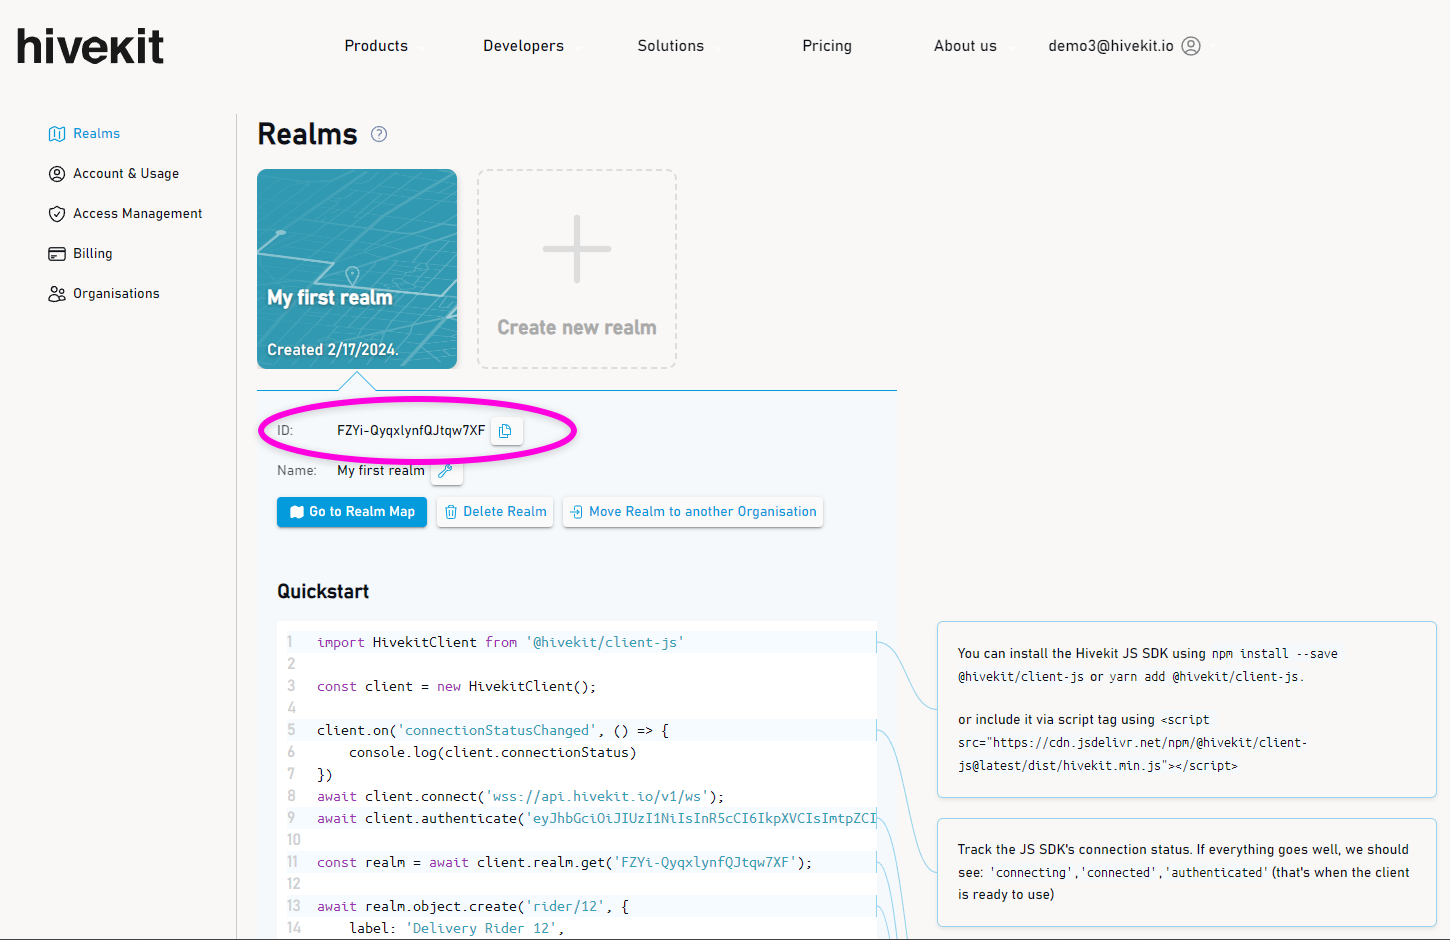
The Realm ID
The realm ID can be found on the Hivekit dashboard, just below the selected realm:
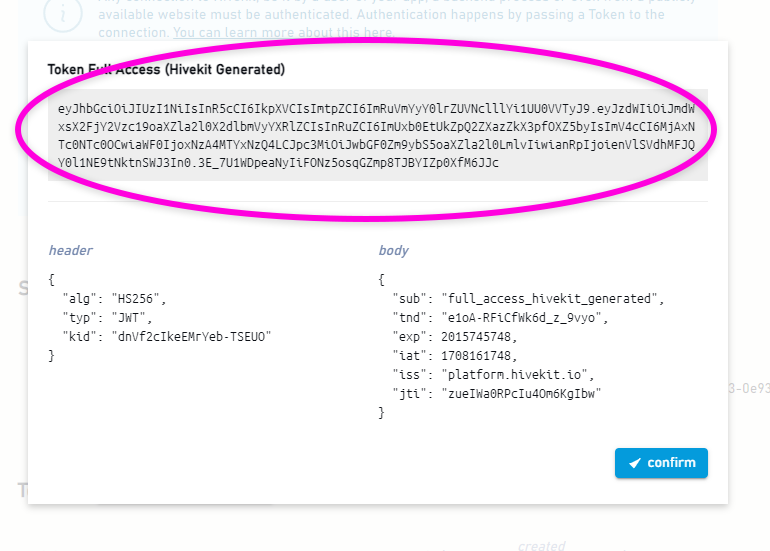
The Access Token
The access token can be found in the "Access Management" section of the Hivekit dashboard.
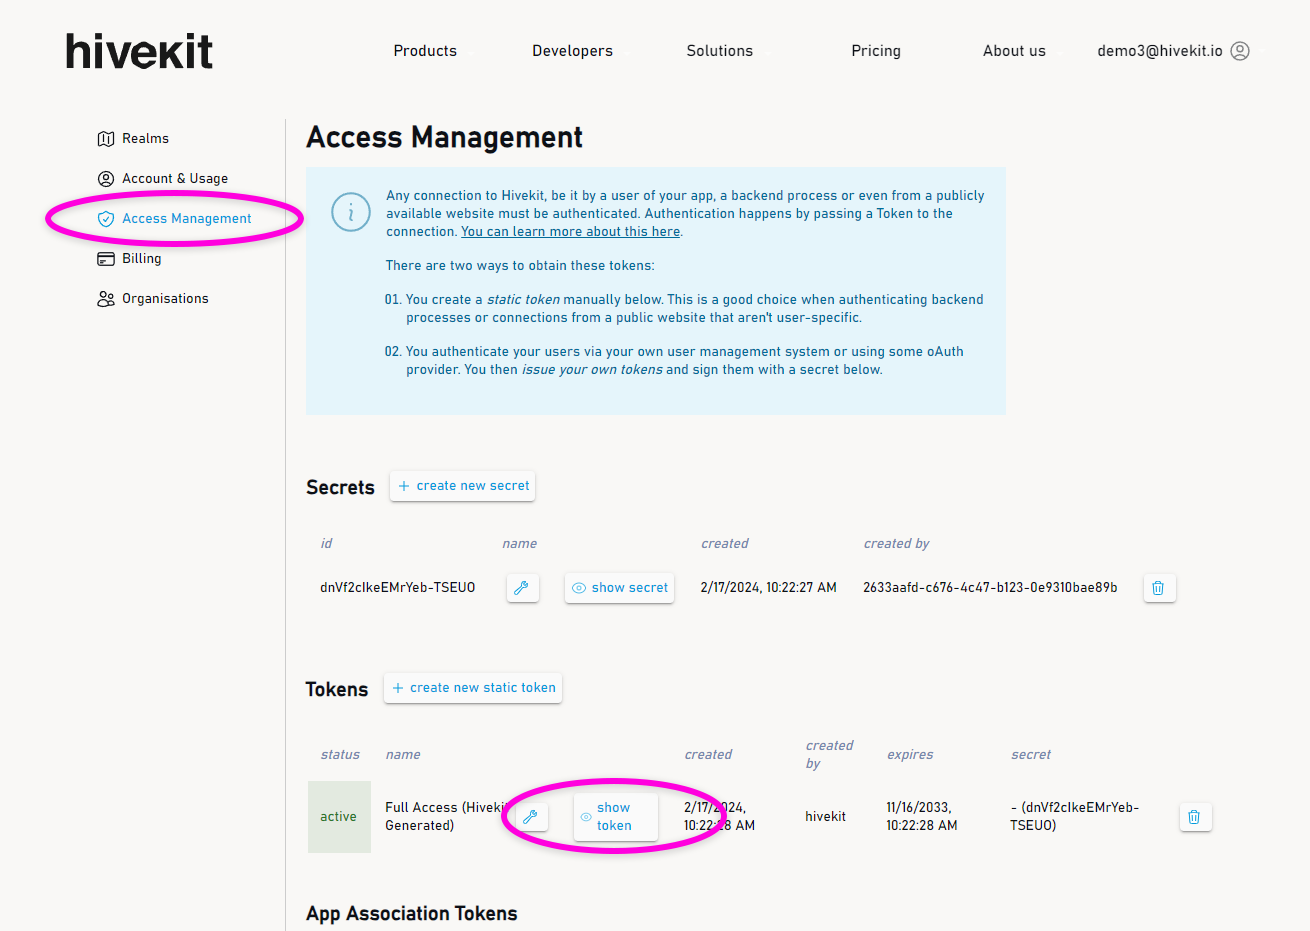
You can display it and copy its value by clicking "show token".
The Object ID
The object id is something we need to generate when creating the object. You can either use an existing id, e.g. a license plate number for a vehicle or come up with your own. Object IDs allow you to identify an object throughout its lifecycle. For this tutorial, we'll use the id rider-12.
Step 4: Create the object
We now have everything we need to make our HTTP request. We'll use the curl command to make the request. If you're using a different programming language, you can use any HTTP library to make the request, as well as desktop clients like Postman or Insomnia.
curl -X POST \
  https://api.hivekit.io/v2/realm/realm-6XmQP7V2grlPAn6nO5I9T/object/rider-12 \
  -H 'Authorization: Bearer YOUR.ACCESS.TOKEN' \
  -H 'Content-Type: application/json' \
  -d '{"label":"Delivery Rider 12","location":{"latitude":52.5240,"longitude":13.397567},"data":{"charge":0.7}}'
This command sends a POST request to the https://api.hivekit.io/v2/realm/realm-6XmQP7V2grlPAn6nO5I9T/object/rider-12 endpoint with the access token as a header and the object data as a JSON payload.
Step 5: Check the object on the map
After running the curl command, you should see a response like this:
{"result": "success"}
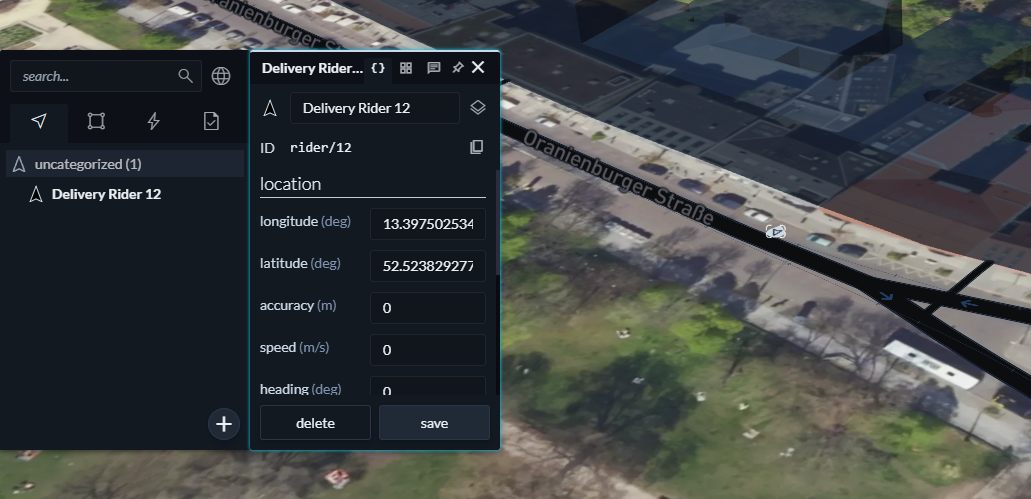
But - who wants to trust that? Let's check if our object really exists. We can do this by visiting the Realms section of the Hivekit dashboard and clicking on "Go to Realm Map". Here, we should find our new object on the category tree on the left - as well as on the map itself. When we click on the object, we should see its label, location and data.
Step 6: Update the object
Let's send another request, exactly like the one above - but we'll change the location and charge of the object. As soon as the request is sent, you should see the changes reflected on the map.
Step 7: Read the object
Finally, we'll read the object's data. This can be done by sending a GET request to the same URL as before, with the same Authorization header, e.g.
curl -X GET \
  https://api.hivekit.io/v2/realm/realm-6XmQP7V2grlPAn6nO5I9T/object/rider-12 \
  -H 'Authorization: Bearer YOUR.ACCESS.TOKEN'
This should return a JSON object with the object's data, e.g.
{
    "data": {
        "charge": 0.7
    },
    "label": "Delivery Rider 12",
    "location": {
        "accuracy": 0,
        "altitude": 0,
        "altitudeAccuracy": 0,
        "heading": 0,
        "latitude": 52.524,
        "longitude": 13.397567,
        "speed": 0,
        "time": "2024-02-20T08:47:45.260410438Z"
    }
}
And that's it! You've successfully created, updated and read an object using Hivekit's HTTP API. You can now use this knowledge to manage other Hivekit entities like areas, instructions and tasks. If you have any questions, feel free to ask in the Hivekit Discord Chat or Contact us via email..