Sending GPS Data from a Mikrotik LTAP Mini to Hivekit
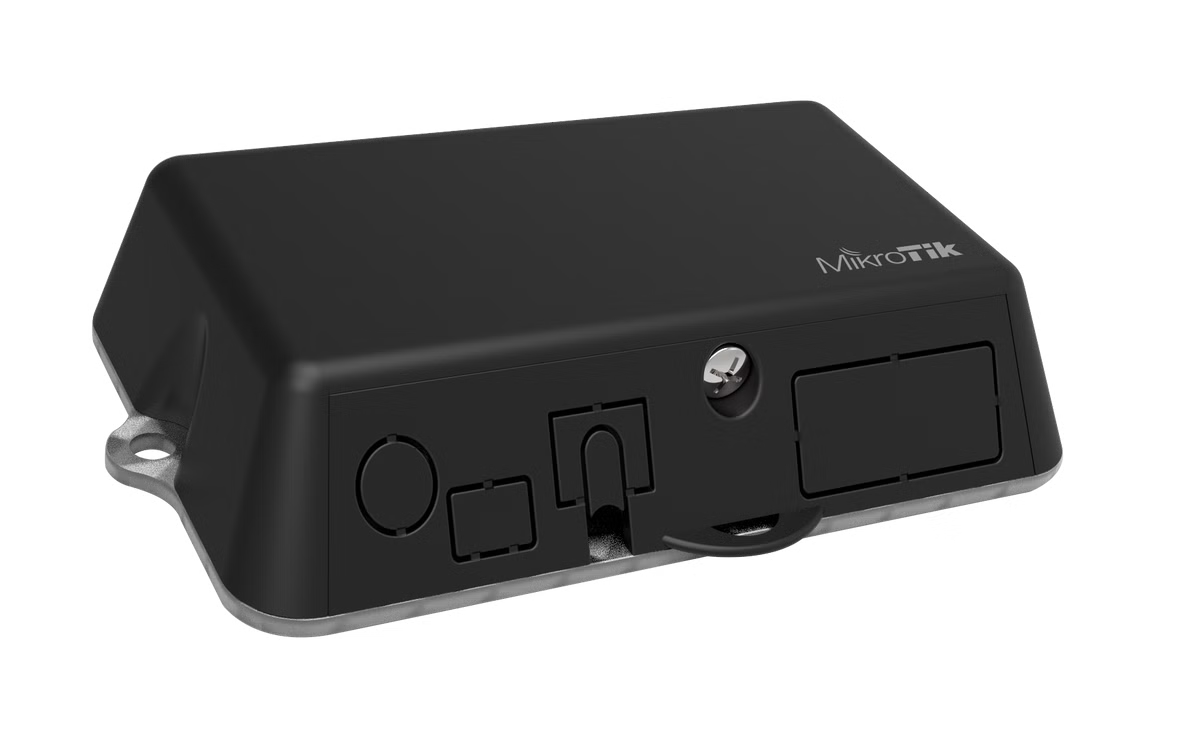
The LTAP mini is a small weatherproof-ish router with integrated LTE antennas (with two u.fl connectors for external antennas) and a miniPCI-e slot, which can be used for an LTE modem or other wireless configurations. It can be used to transmit GPS and Machine Data directly to Hivekit using its integrated scripting abilities.
Is the LTAP Mini a good choice?
It's a bit of a mixed bag. The LTAP Mini advertises that it comes with built-in GPS and LTE, but the GPS does not work in practice (which Mikrotik freely admits to) and the built-in LTE antenna only really works in areas with very strong signal. But if you put in a bit of work to add external GPS and LTE antennas, it is a fairly cost-effective way to track vehicles in rugged environments and to switch between Wifi and LTE connectivity. The USB and serial ports also allow inclusion of other sensors and devices. If you are purely looking for mobile data-based position tracking and don't mind charging a battery once a month, you might be better off with a magnetic GPS tracker with a built-in antenna and battery.
What you will need
-
Hardware
-
Hardware for LTE Usage
-
Tools
- Small Philips Head Screwdriver
- Drill with 6mm Drill Bit
- Knife (to remove silicone)
- Electronics Grade Silicone Adhesive, e.g., Chip Quick (very different from kitchen sink silicone!)
Preparing the hardware
We'll start by adding the external GPS antenna. This will allow us to get a GPS fix even in areas with weak signals.
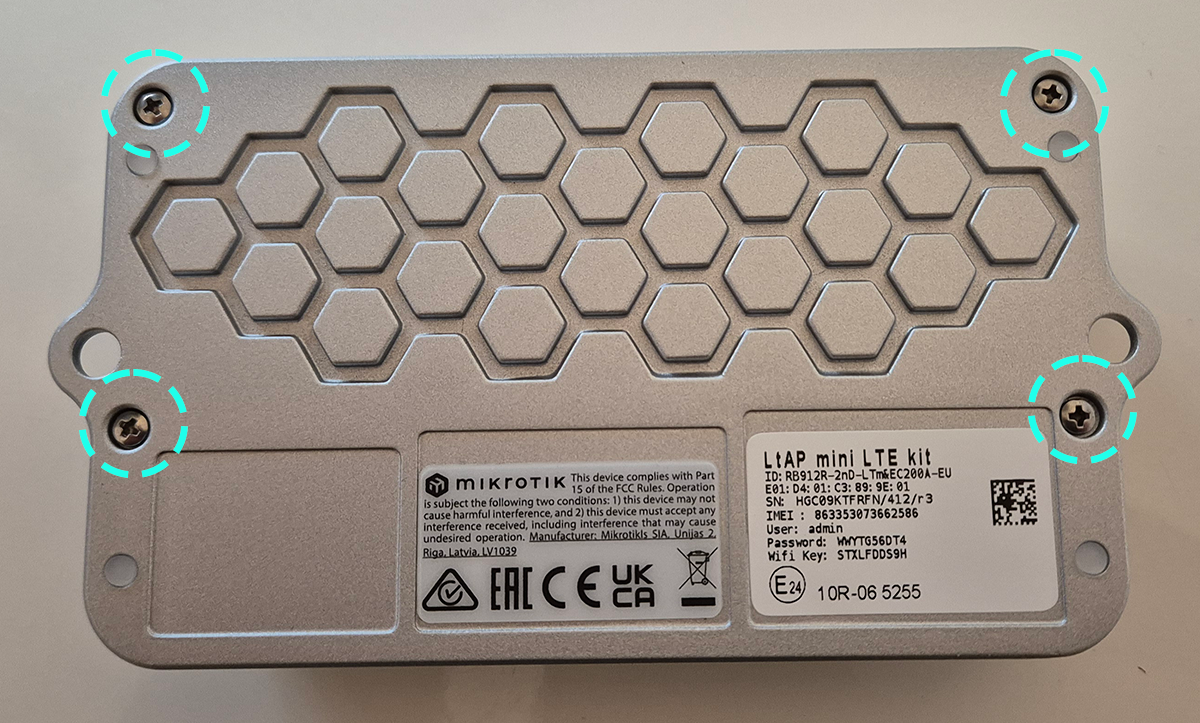
1. Remove the four screws on the back of the LTAP Mini.
2. Free up the GPS antenna connector
Upon removing the cover, you'll see three wires going from the integrated GPS/LTE antenna in the lid of the LTAP Mini to the mainboard. They are covered with a silicone adhesive. The LTE antenna cables are grey, and the GPS antenna cable is black. Carefully remove the silicone with a knife to free up the GPS antenna connector. (You'll probably end up removing the whole silicone blob, but that's fine. We'll add it back later.)
![]()
3. Drill a hole for the GPS antenna
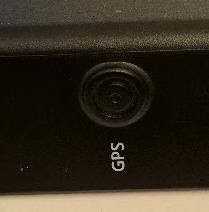
Drill a hole into the center of the cover of the LTAP Mini with a 6mm drill bit where it says GPS.
4. Attach the GPS antenna connector
Take a U.FL to SMA Female Pigtail Cable and install the wider end into the newly drilled hole.
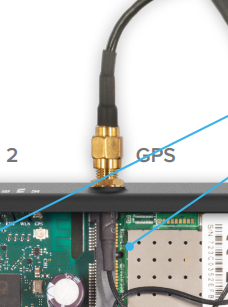
5. Attach the connector to the mainboard
Attach the other end of the GPS antenna connector to the mainboard where the GPS antenna was previously connected.
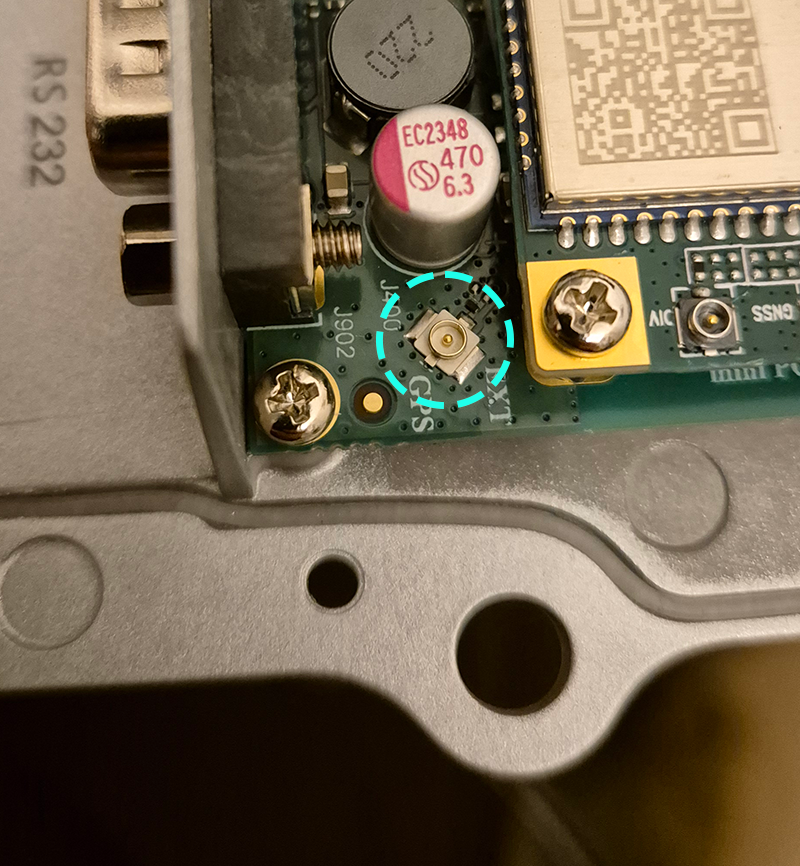
6. Fix it in place with silicone and reassemble the LTAP Mini
These tiny connectors will easily come loose when the unit is moving around in rough terrain. Replace the silicone that you've removed earlier to fix the connector in place and reassemble the LTAP Mini. You might want to skip this step for now and continue with this guide to make sure that everything works before you fix the connector in place.
7. Attach the GPS antenna
Plug your external GPS antenna into the newly installed connector, plug in the power supply, and wait a few moments for the LTAP to boot up.
Router Set Up
8. Connect to your Mikrotik
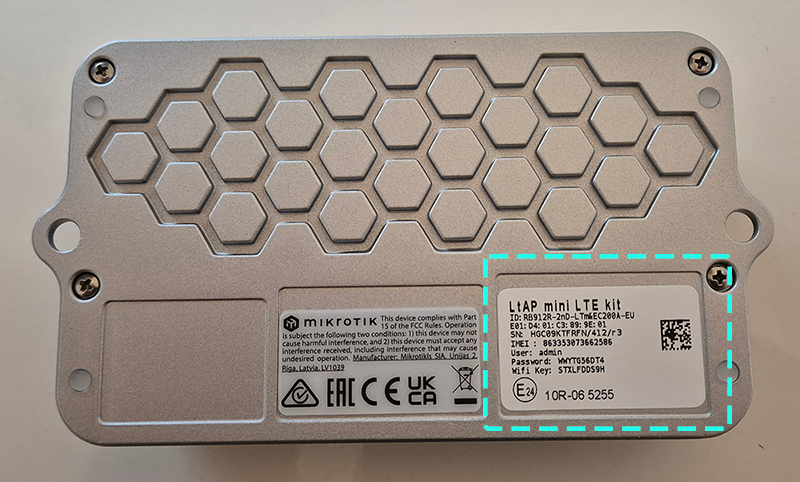
For this tutorial, we'll be using the web interface of the Mikrotik. If you prefer the command line, you can also connect via ssh admin@192.168.88.1 with the password from the back of the router. Then run the following commands to disable the console and enable the serial port for GPS data:
/system console disable 0
/system gps set port=serial0 enabled=yes gps-antenna-select=external
/port set 0 baud-rate=auto data-bits=8 flow-control=none name=serial0 parity=none stop-bits=1
Get to a computer, open Wi-Fi and look for a network called Mikrotik-XXXXXX. Connect to it, open a browser, and navigate to http://192.168.88.1/. Log in as admin with the password from the back of the router. Alternatively, if you are using a Windows computer, you can also download Mikrotik Winbox for a nicer user interface.
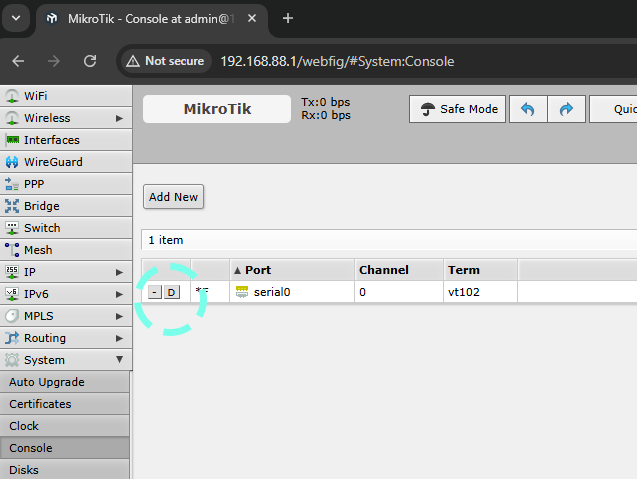
9. Disable the Console
When using the LTAP Mini, the serial port and GPS cannot be used concurrently. However, the serial port is used for console output by default. Navigate to System -> Console and disable the console by clicking the little "D" button.
10. Disable the Serial Port
Navigate to System -> Ports and disable the serial port.
11. Enable the GPS
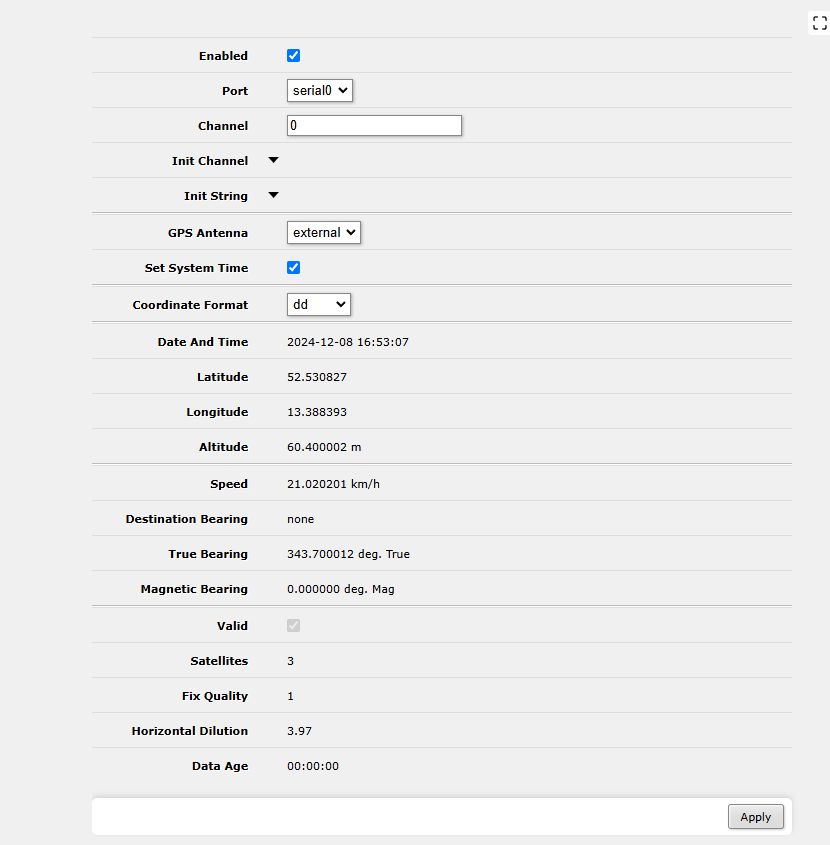
Navigate to System -> GPS and tick the checkbox to enable the GPS. Choose serial port 0 and external GPS antenna. Click apply. Make sure the GPS antenna is somewhere near a window or outside to get a good signal. Now it's time to get a coffee; it might take a few minutes for the GPS to get a fix.
Setting up Hivekit
12. Set up a Realm in Hivekit
To see the tracking data in Hivekit, we'll create a realm and a vehicle category within it. Then, we'll create the concrete object we want to track. Finally, we'll use Hivekit's REST API to send data from the Mikrotik router to Hivekit. To learn more about this approach, check out the Getting Started Using REST Tutorial.
Log into your Hivekit account and create a new realm. You can name it whatever you want. Copy the realm ID from the dashboard and note it down.
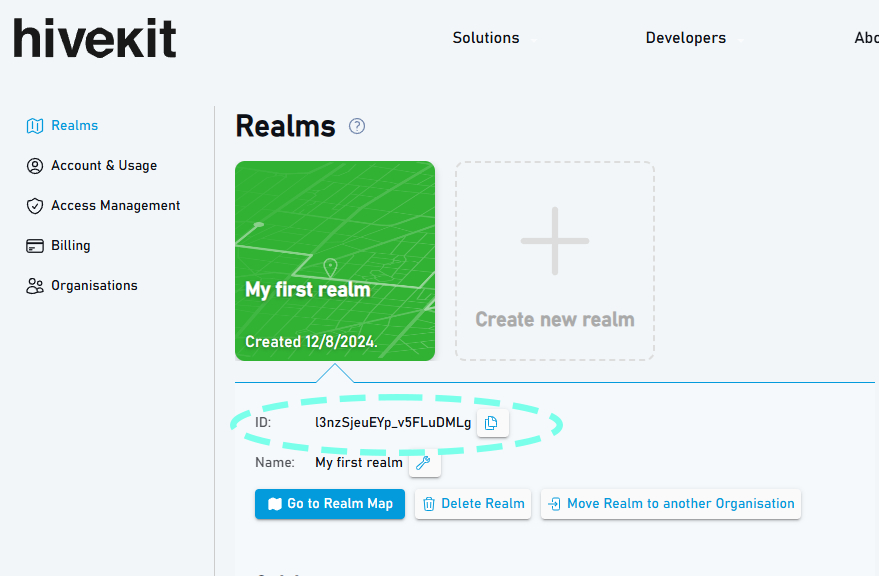
13. Create a Vehicle Category
Create a category, e.g., "Red Car" in the realm you just created. Then, create a vehicle object in the category. Copy the object ID from the vehicle detail window.
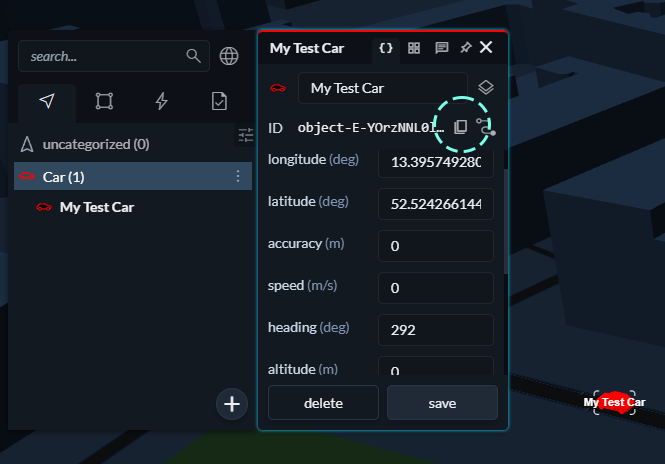
14. Create a Token
Finally, we'll create an access token that allows our request to update the object in Hivekit. On the Hivekit account dashboard, go to Access Management and click Create New Static Token. Provide the realm and object ID for both permissions and data provider patterns and select the update permission.
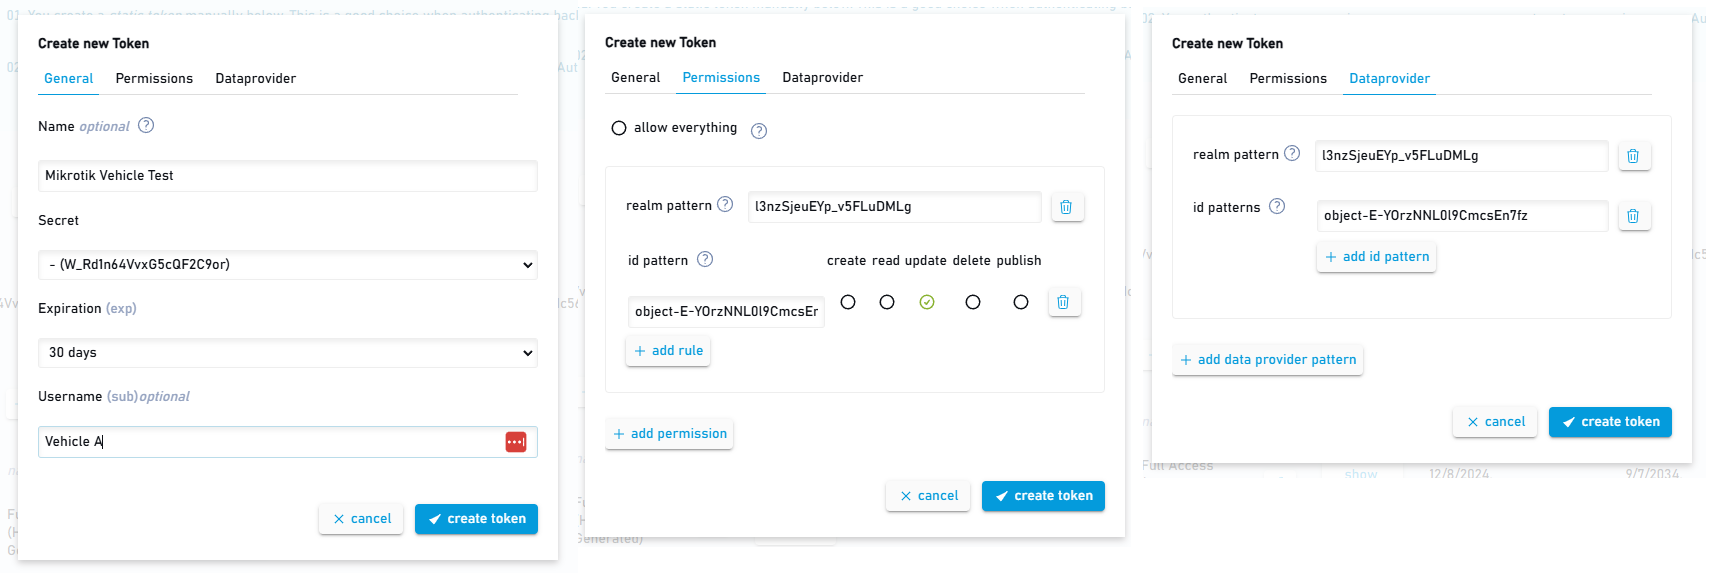
Then, click Show Token and copy the token to your clipboard.
Sending GPS Data to Hivekit
15. Send the data to Hivekit
The next step is to send the GPS data from Mikrotik to Hivekit's Update Object REST API Endpoint. To do this, we'll write a script that sends the GPS data to Hivekit. Just use the script below and replace REALM_ID, OBJECT_ID, and TOKEN with the values you copied earlier.
:global serverUrl "https://api.hivekit.io/v2/realm/REALM_ID/object/OBJECT_ID?token=TOKEN";

:global stripUnits do={
    :local inputString $1;
    :local spacePos [:find $inputString " "];
    :return [:pick $inputString 0 $spacePos];
}
{
:local lat;
:local lon;
:local alt;
:local speed;
:local rawHeading;
:local hea;
:local time;
:local timestamp
/system gps monitor once do={
    :set $lat $("latitude");
    :set $lon $("longitude");
    :set $alt [$stripUnits $("altitude")];
    :set $speed [$stripUnits $("speed")];
    :set $rawHeading $("true-bearing");
    :set $hea [$stripUnits $rawHeading];
    :set $time $("date-and-time");
    :local datePart [:pick $time 0 10];
    :local timePart [:pick $time 11 19];
    :set timestamp ($datePart . "T" . $timePart . "Z");
}
:local jsonData "{\"location\": {\"longitude\": $lon, \"latitude\": $lat, \"altitude\": $alt, \"speed\": $speed, \"heading\": $hea, \"time\": \"$timestamp\"}}";

log info "Sending data: $jsonData";
tool fetch url=$serverUrl http-method=post mode=https port=443 http-header-field="Content-Type:application/json" http-data=$jsonData;
}
To install the script, navigate to System -> Scripts and click the plus button to create a new script. Paste the script above into the source field and click apply. Now, click Run Script and check your Hivekit realm. If your red car moved to the current location of the Mikrotik, everything is working.
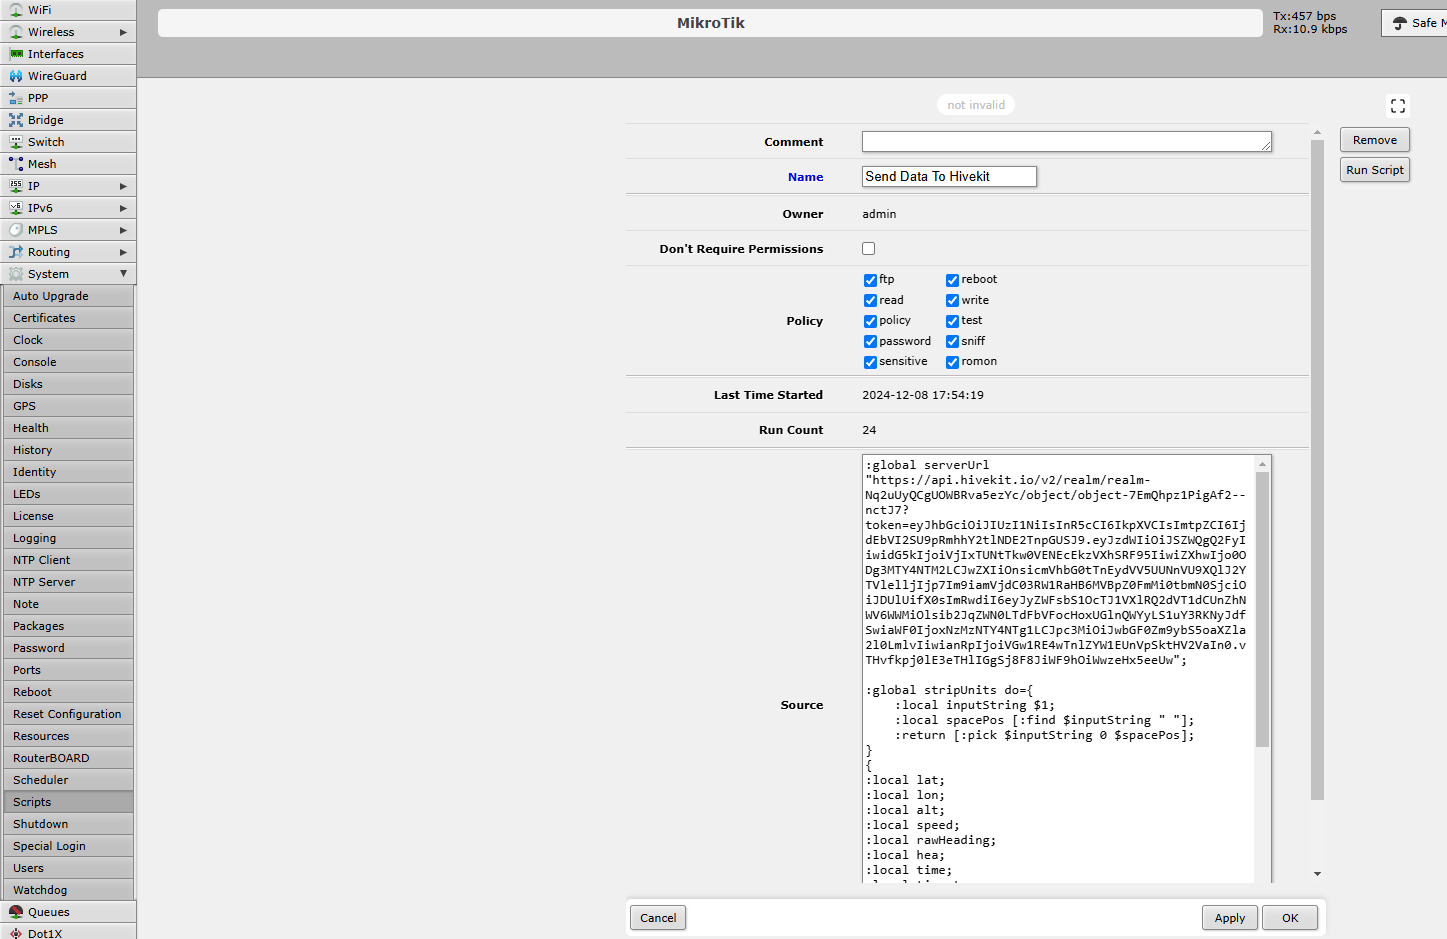
16. Schedule the script to run every few seconds
To send the GPS data to Hivekit every few seconds, we'll schedule the script to run at a regular interval. Navigate to System -> Scheduler and click Add New to create a new schedule. Set the interval to 1, 5, 10, or however many seconds your heart desires and enter the name of your script in the "On Event" field. Click apply.
Now your Hivekit object should update continuously, based on the data received from Mikrotik. If it isn't, check the Mikrotik logs for errors and make sure the GPS has a fix.
Caveats
- The script in this tutorial sends updates instantly or drops them if no connection is available. For production use, it'd be good to write them to a file and send them in batches once the connection is restored.
- This tutorial expects you to create each tracked vehicle and its token manually in Hivekit. Instead, it might be preferable to give CREATE permissions to a category of objects by using an ID pattern, e.g.,
car/*.