Using JavaScript or Node.js
Here's how to connect your browser app or Nodejs backend to the Hivekit platform. How to create an object, see it on a map and subscribe to updates.
If you don't feel like reading, here's a short (5 min) video that shows you how to do it:
Let's start with two core concepts that we'll use in this tutorial:
Realms: A realm is just a space within which something happens. It can be as small as a room or as large as the world. Every other Hivekit concept like Objects, Areas, Functions or Tasks live within a realm.
Object: An object is a thing that has a location - and optionally some data. It can be a vehicle or a person or a sensor. For this tutorial, we'll create a simple object that represents a delivery rider.
Step 1: Sign in to Hivekit
Signing in to Hivekit is free and only requires an email and a password. You can sign up here.
Step 2: Check the code sample
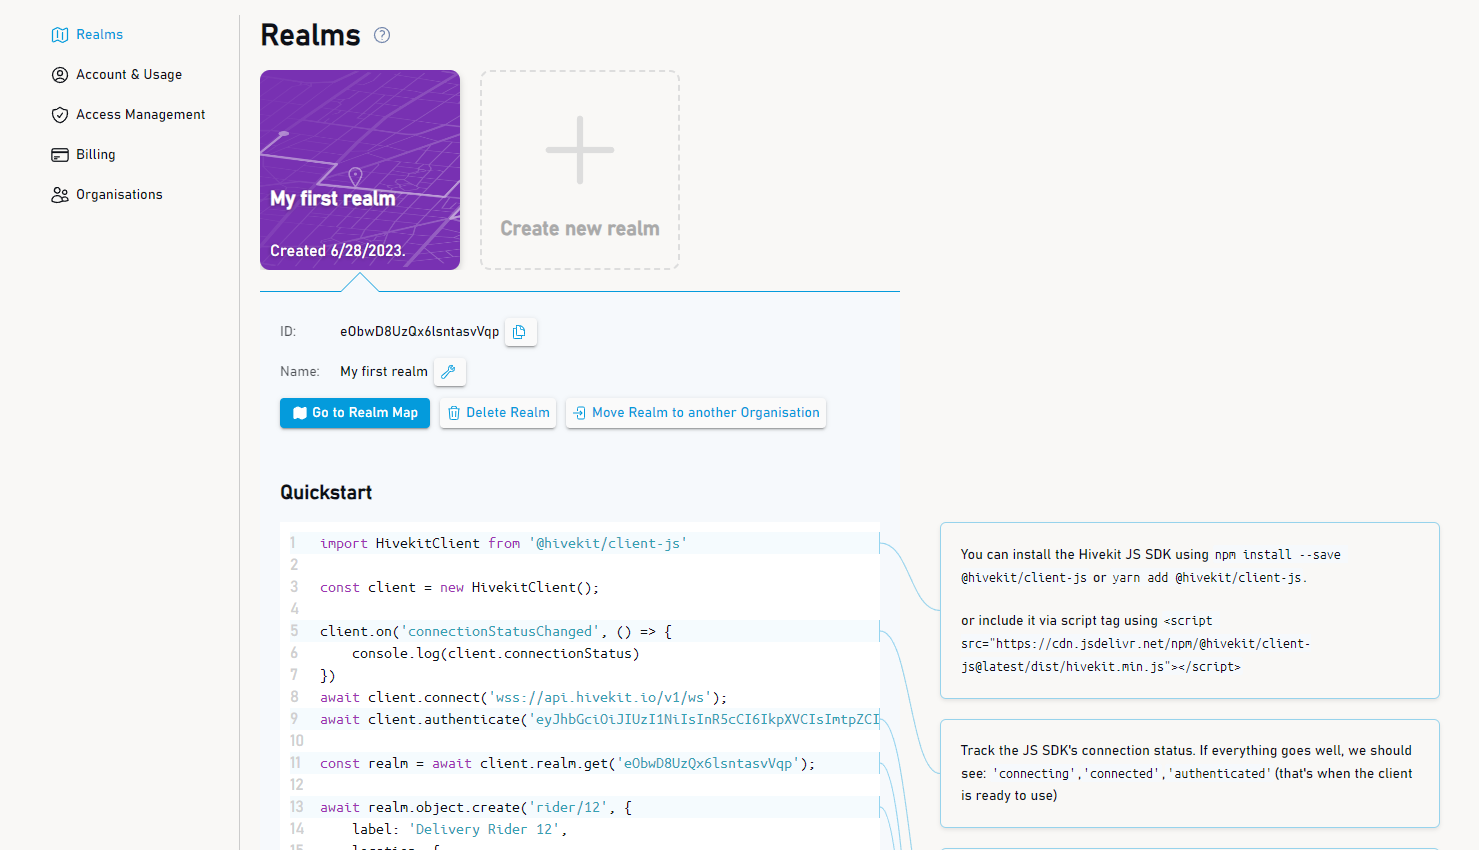 Once you sign up, Hivekit will automatically create a first realm for you. You can see it in the dashboard. Below, you'll find a code sample in JavaScript that's already populated with your realm's id and an initial authentication token.
Step 3: Create a NodeJS project
Create a new directory and run npm init to create a new NodeJS project. Then, install the Hivekit SDK by running npm install '@hivekit/client-js. Lastly, create a file called index.mjs
Step 4: Copy the code sample
We'll make our live easy here and just copy the code sample from the dashboard, up to the point where we create an initial object. Let's add the following to your index.mjs file:
import HivekitClient from '@hivekit/client-js'

const client = new HivekitClient();

// Listen to connection status changes
client.on('connectionStatusChanged', () => {
    console.log(client.connectionStatus)
})

// Connect to the Hivekit platform
await client.connect('wss://api.hivekit.io/v1/ws');

// Authenticate with your auth token
await client.authenticate('YOUR_AUTH_TOKEN');

// Get the realm
const realm = await client.realm.get('YOUR_REALM_ID');

// Create a new object
await realm.object.create('rider/12', { // 'rider/12' is the id of the object
    // the label can be any string describing the object
    label: 'Delivery Rider 12',
    // location follows a
    location: {
        latitude: 52.52382927744,
        longitude: 13.397502534660
    },
    data: {
        charge: 0.6
    }
});
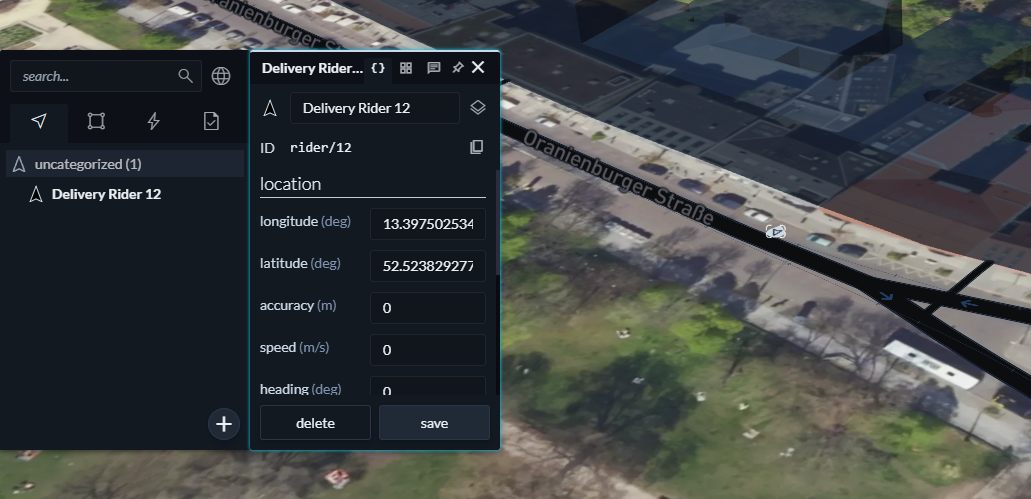
Let's run this using node index.mjs. If everything is set up correctly, you should see your console log connecting -> connected and authenticated. Now, on the Hivekit dashboard, click Go to Realm Map, just above the code sample. You should see a marker on the map representing your rider. If not, click on the menu on the left on "uncategorized" and you should see your rider there.
Step 5: Subscribe to updates
Now that we have our rider on the map, let's subscribe to updates. To do so, we get a subscription using realm.object.subscribe() and then listen to it's update event. Add the following code to your index.mjs file:
const subscription = await realm.object.subscribe();
subscription.on('update', data => {
    console.log(data);
});
This subscription is very basic. It listens to any change to any object within a realm. That might be what you want for admin dashboards or firehose style data feeds, but for client apps you might want to subscribe to specific objects or areas. There's a lot more you can do with subscriptions, check out the documentation for more details.
With this subscription code in place, restart your node process with node index.mjs. Now, if you move the rider on the map, and click save (!!!) you should see the console log the new location.
Step 6: Next steps
That's it! You've connected your NodeJS backend to the Hivekit platform. There's a lot more to discover, but first - let's understand the basics. So let's head to our core concepts guide to understand the basics of Hivekit. Then, you can check out the JavaScript SDK documentation to see what else you can do with the SDK.